Create a VM template with VMWare Workstation 8
Most of the times I need to setup VMs quickly on my workstation for swift POC’s, so rather than setting up a new VM manually from ground zero in order to save time I decided to create a couple of templates that will save me at least 20-30 minutes of initial setup an configuration.
Before thinking of creating a template, I thought I’d be able to create a virtual machine using the CLI but sadly neither vmrun.exe nor vmplayer.exe (both found in the installation directory of VMware workstation) did help.
Since most of my VMs are Microsoft’s Windows Server 2008, I’m going to rely on it to fulfill this post.
Step[1]:
Create your virtual machine and configure it, from my point of view two things are a must:
- Install VMware Tools
- Configure ICT (this is a very important tool for configuring a new server – MAKE IT A HABIT).
Other than the above you should tend while configuring the virtual machine to globalize it’s content, this is what a template suggests “to be able to use it as a general purpose resource”.
Step[2]:
After the virtual machine is configured we need to prepare it at the operating system level before commencing with configuring it as a template for VMware Workstation 8, for that Microsoft provides its Windows Server 2008 with a tool called ‘SysPrep‘ and from what it sounds like obviously it means ‘System Preparation’ =).
1- Go to start -> run -> type sysprep
2- This will open a new window leading to (C:\Windows\System32\sysprep) where the sysprep files reside.
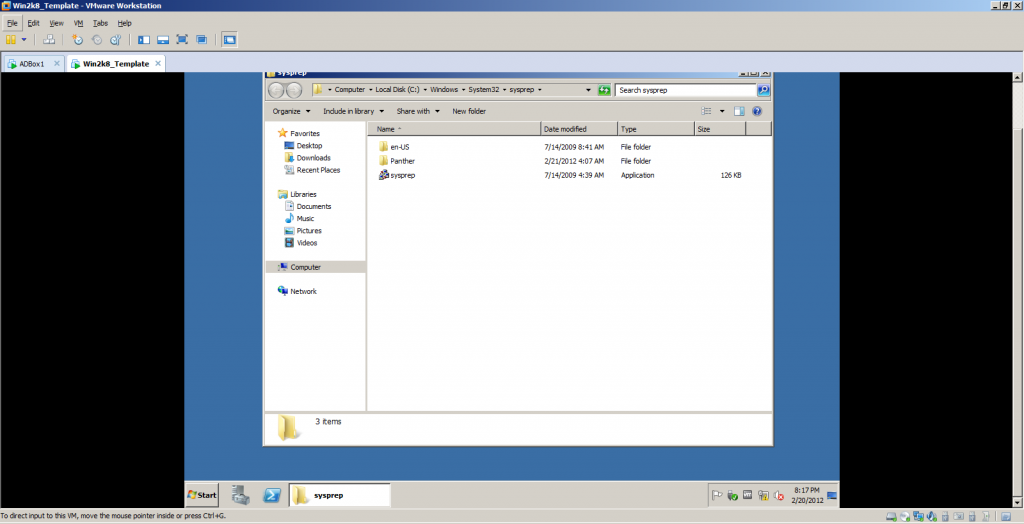
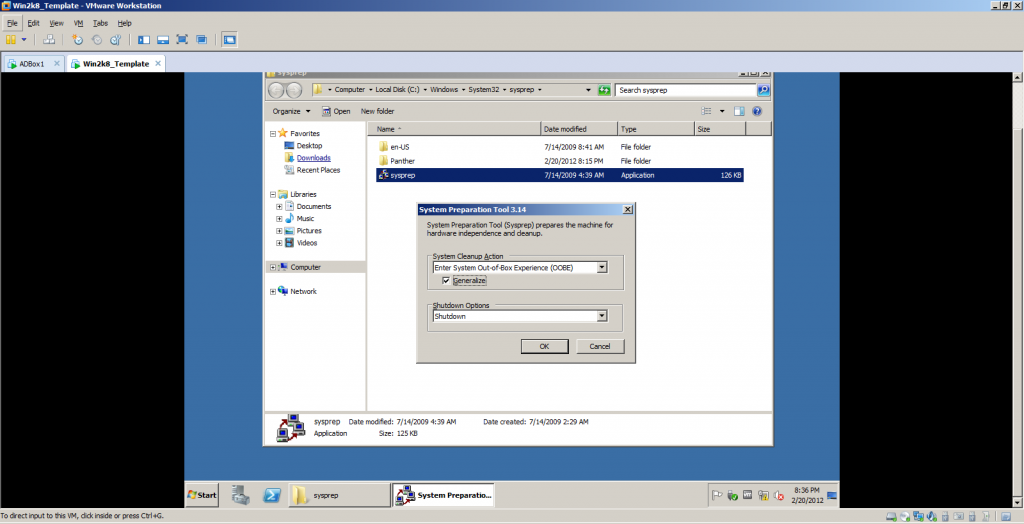
3- Start the sysprep tool, the tool will simply reset the state of your OS to the initial state of installation including the GUID (computer’s globally unique identifier) and the MSID (Machine Security Identifier) whom both are unique especially in an Active Directory environment. Once the tool launches configure it according to thereunder steps:
- System Cleanup Action: Enter System Out-of-Box Experience (OOBE)
- Check Generalize
- Shutdown Options: Shutdown
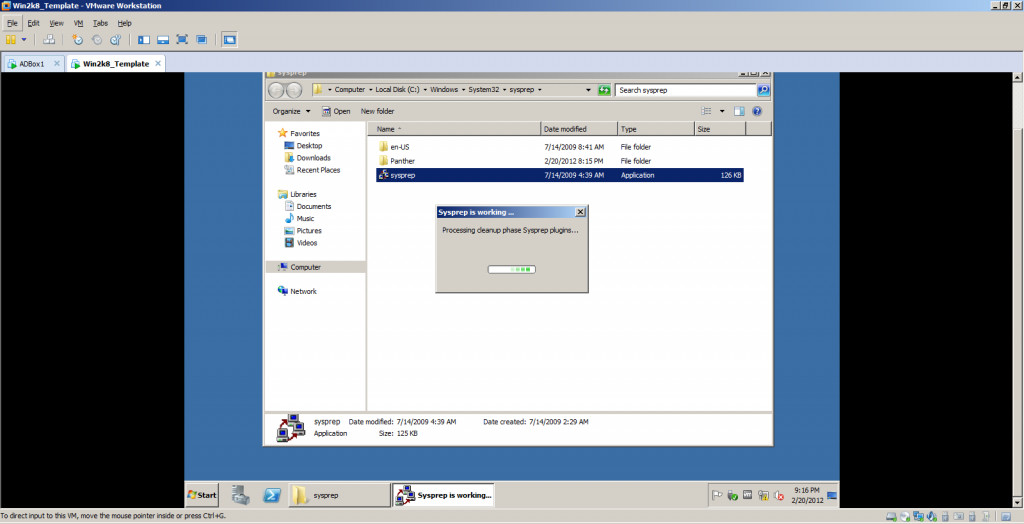
4- Press okay and let SysPrep do it’s magic.
5- When sysprep is done, it will shutdown the system.
Step[3]:
Now that our virtual machine is prepared and ready, here comes the VMware Workstation part. Now we can just modify the virtual machine’s properties to make it act as a template for cloning, or we can do what is better and create a snapshot then create our clones from this snapshot.
Note that the following part is going to be done from CLI, never then less it can be done from the GUI as well but as it has been since the very dawn of the command line, everything that can be scripted is for sure better and efficient.
- Run cmd
- Type : cd “C:\Program Files (x86)\VMware\VMware Workstation\”
- Type: vmrun snapshot <path to the .vmx file of the virtual machine> <snapshot name>
- Now you have a snapshot created, you can use: vmrun listsnapshots <path to the .vmx file of the virtual machine> showTree to list snapshots.
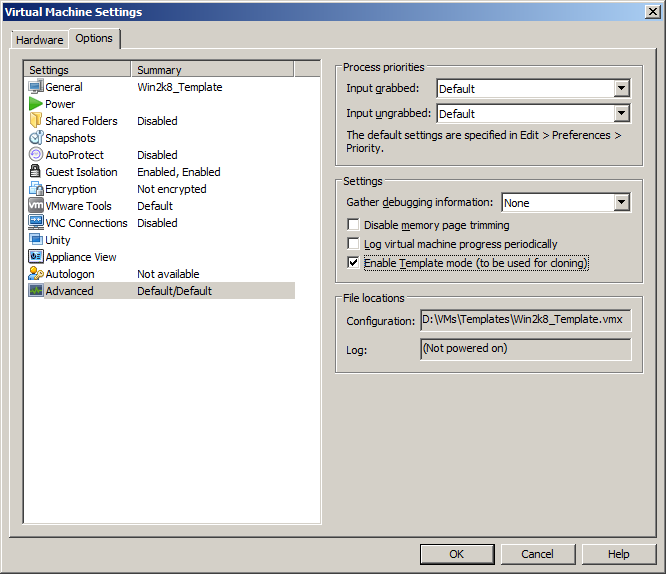
Modify the virtual machine properties to enable “Template Mode” this will help us when cloning the virtual machine to be detected as a template.
- Go to your virtual machine’s settings.
- Select the options tab.
- Select the advanced option
- Check “Enable Template Mode (to be used for cloning)”.
- Click Ok.
Now for the result of our work, we’re going to create a clone from the snapshot which we’ve take earlier also using vmrun
- Run cmd
- Type : cd “C:\Program Files (x86)\VMware\VMware Workstation\”
- Type: vmrun clone <path to the .vmx file of the virtual machine> <path to the new .vmx file of the new VM> full|linked <snapshot name>
So there you have it, you set the paths correctly and choose the clone whether you want it to be a full or linked, full will create a fully separate virtual machine and linked will create a dependent virtual machine (Which means that the original template virtual machine must be running when running this) of course linked requires less disk space.
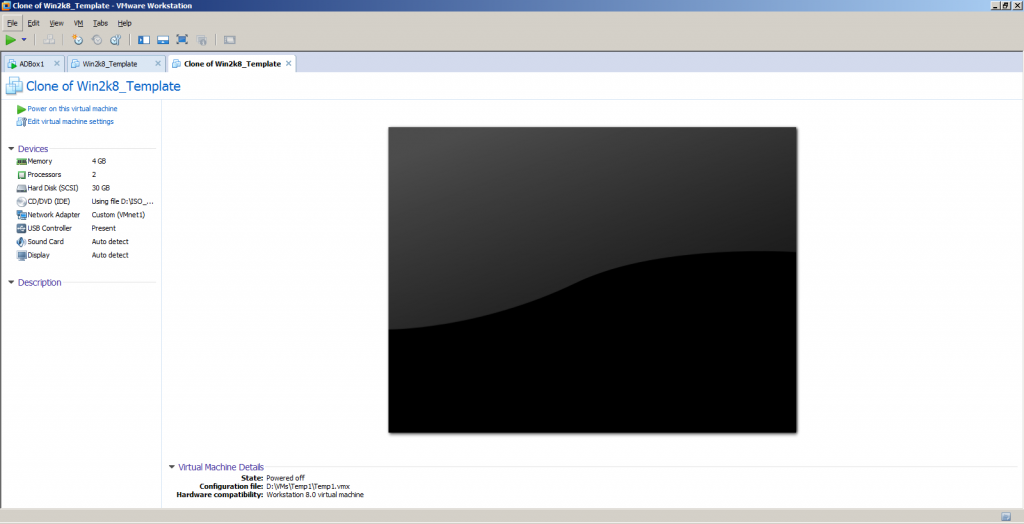
Go to to path of the new virtual machine and double click on it so that it would load into VMware Workstation 8 panel, and voila you have you new healthy virtual machine.
Enjoy cloning =).


i think it should have more educational articles like yours, so everyone would be able to learn something new.
Thank you very much this is very encouraging =).
exactly, this post is informative, really a good source.
GREAT! COOL! I loved it!
Exactly where can i unearth your rss feed?
be more accurate in your quotations.
I was very pleased to find this web-site.I wanted to thank for your time of this wonderful read!! I definitely enjoy every little bit of it and I have you bookmarked to check out new stuff you blog post.
ome truly pleasant stuff on this site , I have fun with it.
Great article! I loved the insight and advice given. Further, your writing style is very pleasing to read.
You have noted very interesting points! ps nice internet site.
Some genuinely interesting details you have written. Aided me a lot, just what I was looking for : D.
I just want to tell you that I am very new to blogs and seriously savored you’re blog. More than likely I’m likely to bookmark your website . You amazingly come with remarkable writings. Kudos for sharing your web site.
Oh my goodness! an amazing article dude. Thank you However I am experiencing issue with ur rss . Don’t know why Unable to subscribe to it. Is there anyone getting identical rss problem? Anyone who knows kindly respond. Thnkx
Thanks, I am not aware of any problems with the RSS feed. Can you please tell me the error you’re getting?
is this solution, is also good for workstation 12 ?
and why we have to do a Sysprep command ?
what about difference between cloning VM and Snapshoting ?
greats
Hello,
I haven’t tested it with version 12 but it should be the same, regarding sysprep this is required whenever you create a new system on Windows so that to get a new SID for the machine, for the difference between clones and snapshots: cloning is a fully fledged copy of a VM where as snapshot is just a point in time freeze that you can revert back to in case you decided to do some operating system maintenance or application installation.
I hope this helps,
(Abdullah)^2
Why is it better to create a snapshot and then create our clones from this snapshot?
A clone means that you’re deploying a full virtual machine (taking into consideration the disk size) where as the snapshot is just whatever you had in the base image and whatever you will install in the future where here the idea is to preserve space.