Presentation Diminution – A VCDX Quest
If you’re a candidate and you’re preparing your presentation, you’ll know from the mocks that you should be able to cover a lot of ground within your main slide deck (if you’re not a candidate then now you know ;-)).
During my first attempt, one of the toughest things that I had to do, was to manage the plethora of ideas and design decisions during the main slide deck and maintain a sense of business level. Each candidate has his own way/method of showing his thought process and how he achieved to get a list of business problems and translated them into technical solutions.
During my first attempt, I found it very annoying to jump between the main slide deck and the backup slides, probably because of the intensity and during the defense it felt time consuming and even if you’re memorized the navigation and had all sorts of links, it takes one memory slip and you’d be out of context while relaying a thought or defending a design decision.
On my second attempt, I was pretty much keen on trying not to use the backup slides as much as possible, from there I started to think about how I will be able to get all of my design decisions while showing their respective diagrams AND stay on the same slide so that to keep myself and the panelists in focus and not lose the momentum while presenting.
During my early days of geekiness, I used to work as a web developer and a graphic designer as well, usually a rule of thumb is when you want someone to focus on a certain topic/area you wouldn’t introduce distractions around it, in our case moving between the main and backup slides would be the distraction.
That said, and since we’re using PowerPoint I did some research to see if I can show/hide objects within a slide when clicking on text for example and after research and playing around with the different options/features, I managed to get what I want using PowerPoints animation in combination with triggers that are object based. Using this new technique, I literally managed to minimize my presentation from 85 slides to 62 slides, which means I was able to fit the content of 23 backup-slides into my 9 (out of 14) core slides.
During my rehearsals, it took me less time to complete my presentation from both a business perspective and down to the tiniest detail when I had to, yet I did go back to some of my backup slides that weren’t main deck material, which was fine and even during my actual defense, between the main slides, some backup slides and the whiteboard it was a pretty successful technique to engage the panelists with.
Now on to the good stuff:
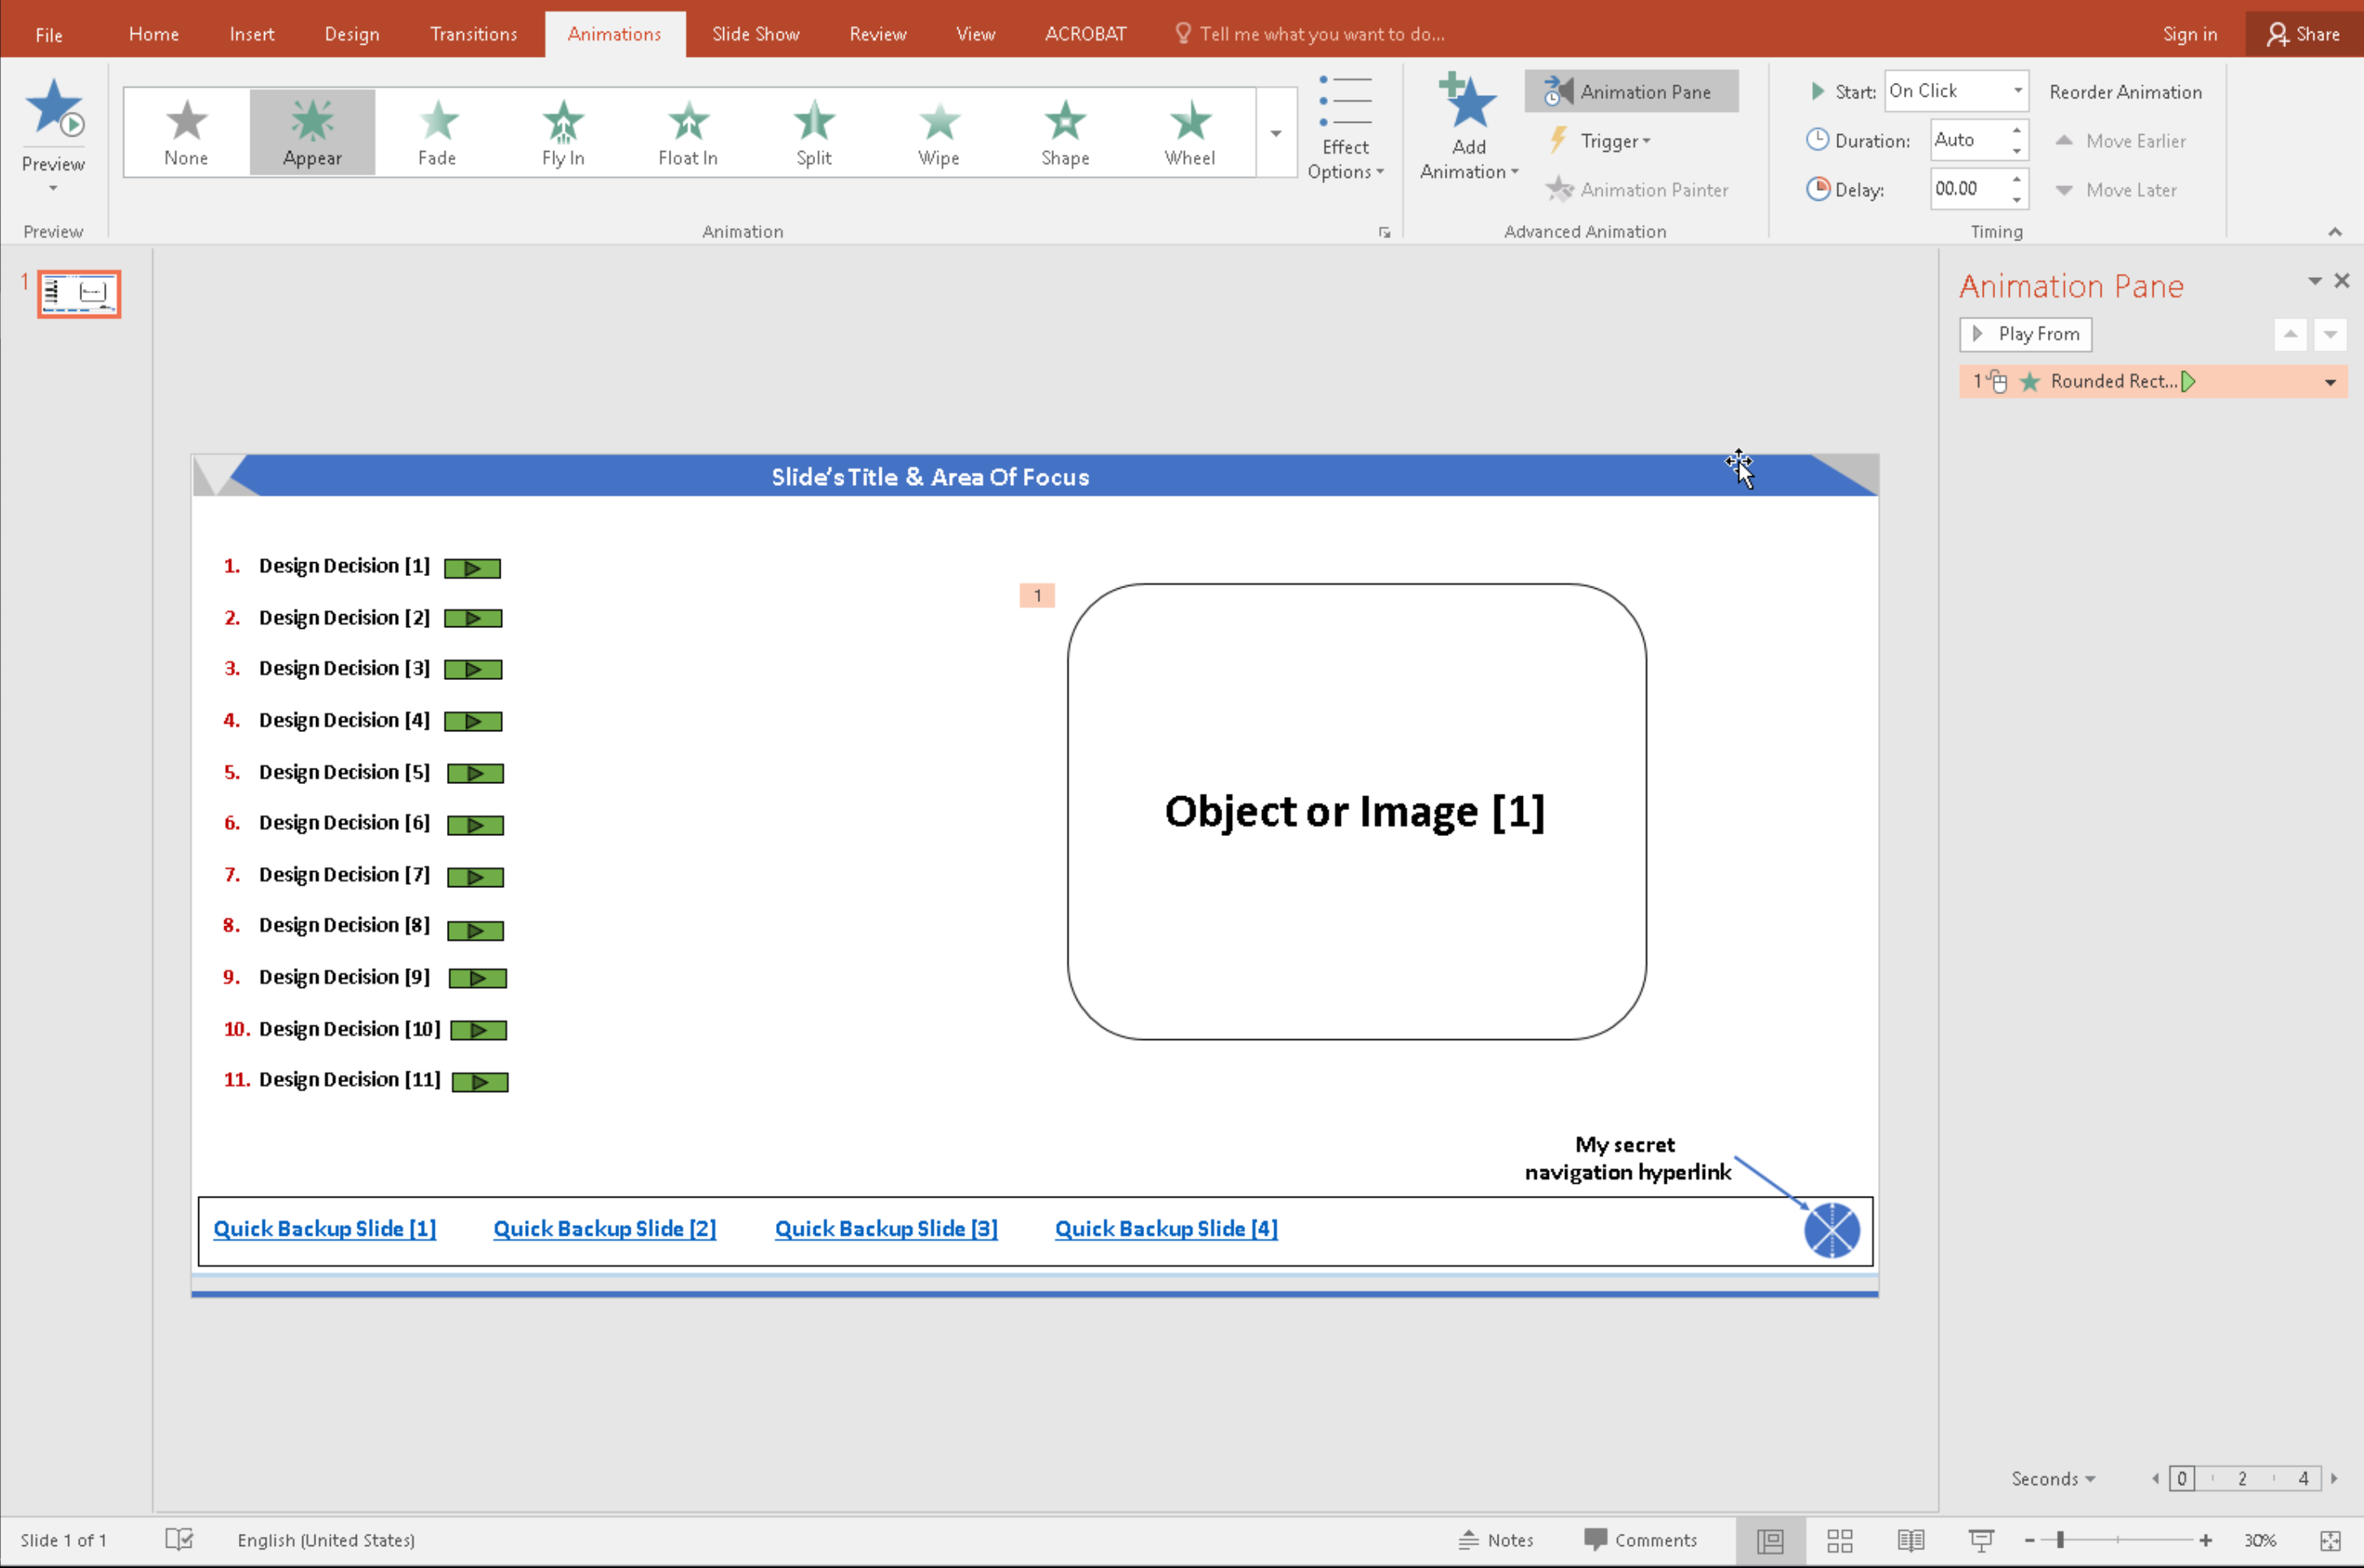
- I resized my slide’s page setup to 100cm (width) x 50cm (height) which gave me more room to fit the text and diagrams/images/screenshots.
- I had a navigation slide along with a hyperlink to it, but because I increased the page setup size, I had more room and I added another line within the slide with hyperlinks to backup slides that were related to the design choices I had displayed.
- Another catch here is that it was not feasible to do this on the Office suite for Mac, I had to do it on my Windows virtual machine.
- In presentation mode, this is how it looks:
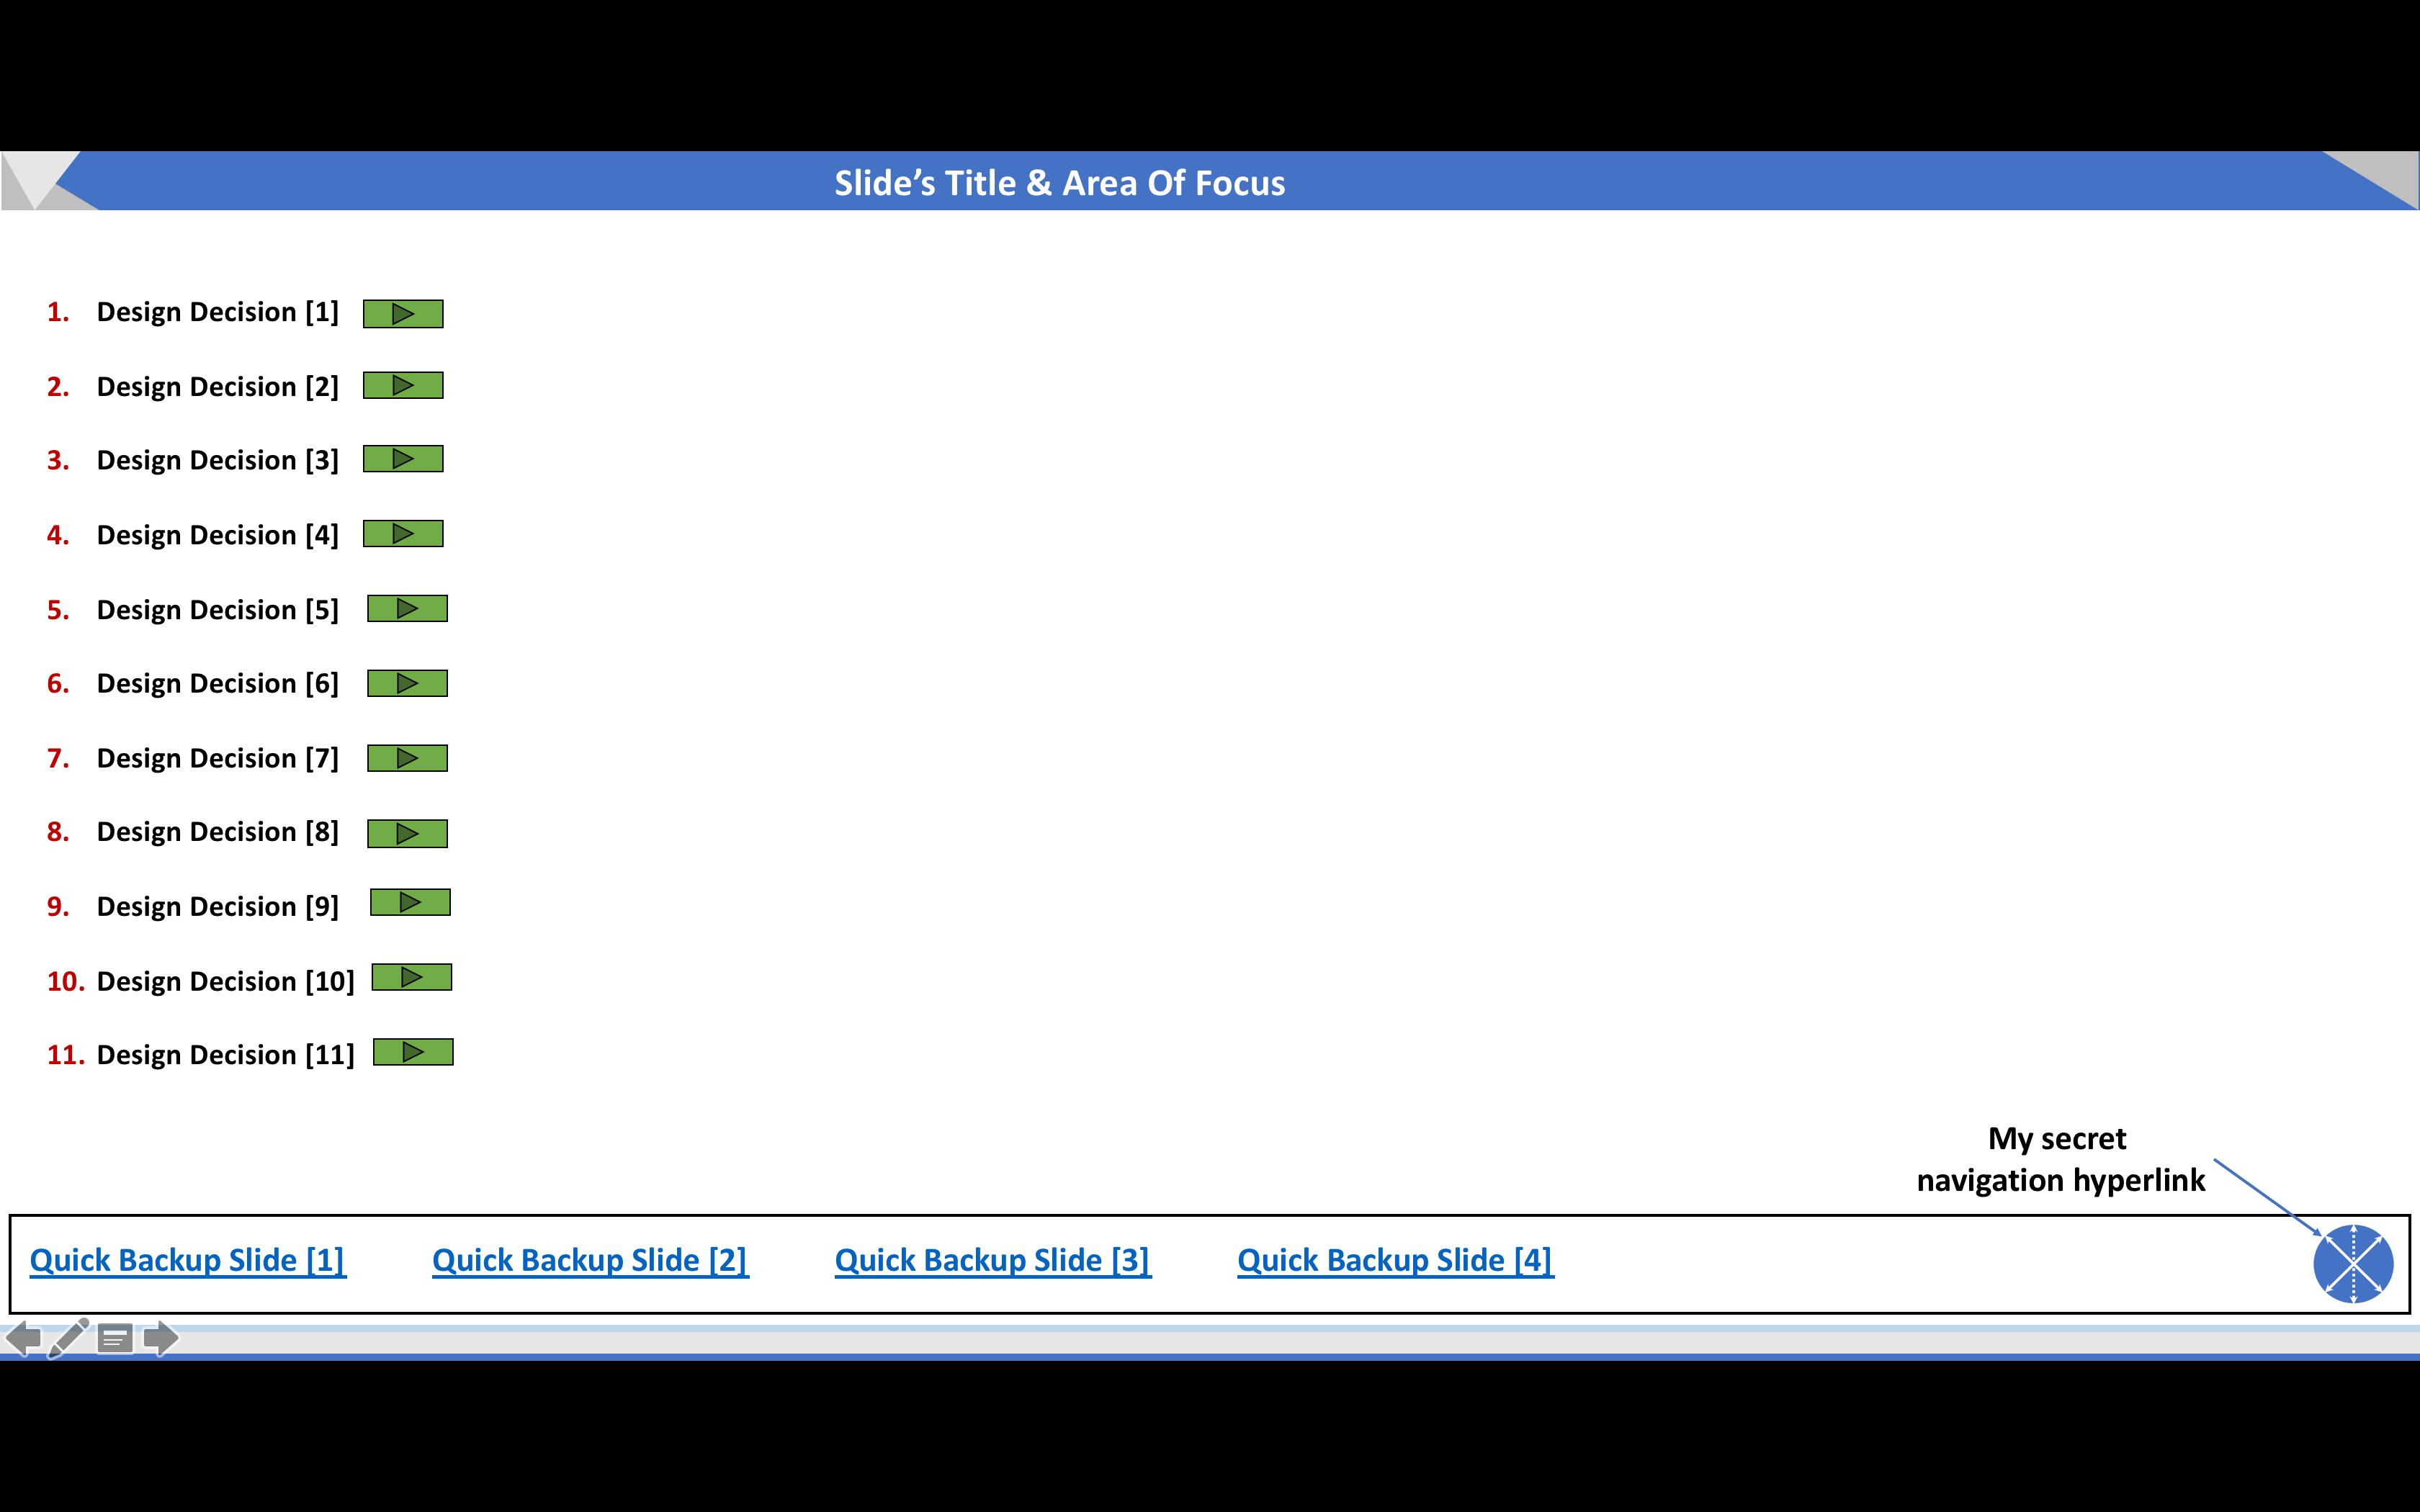
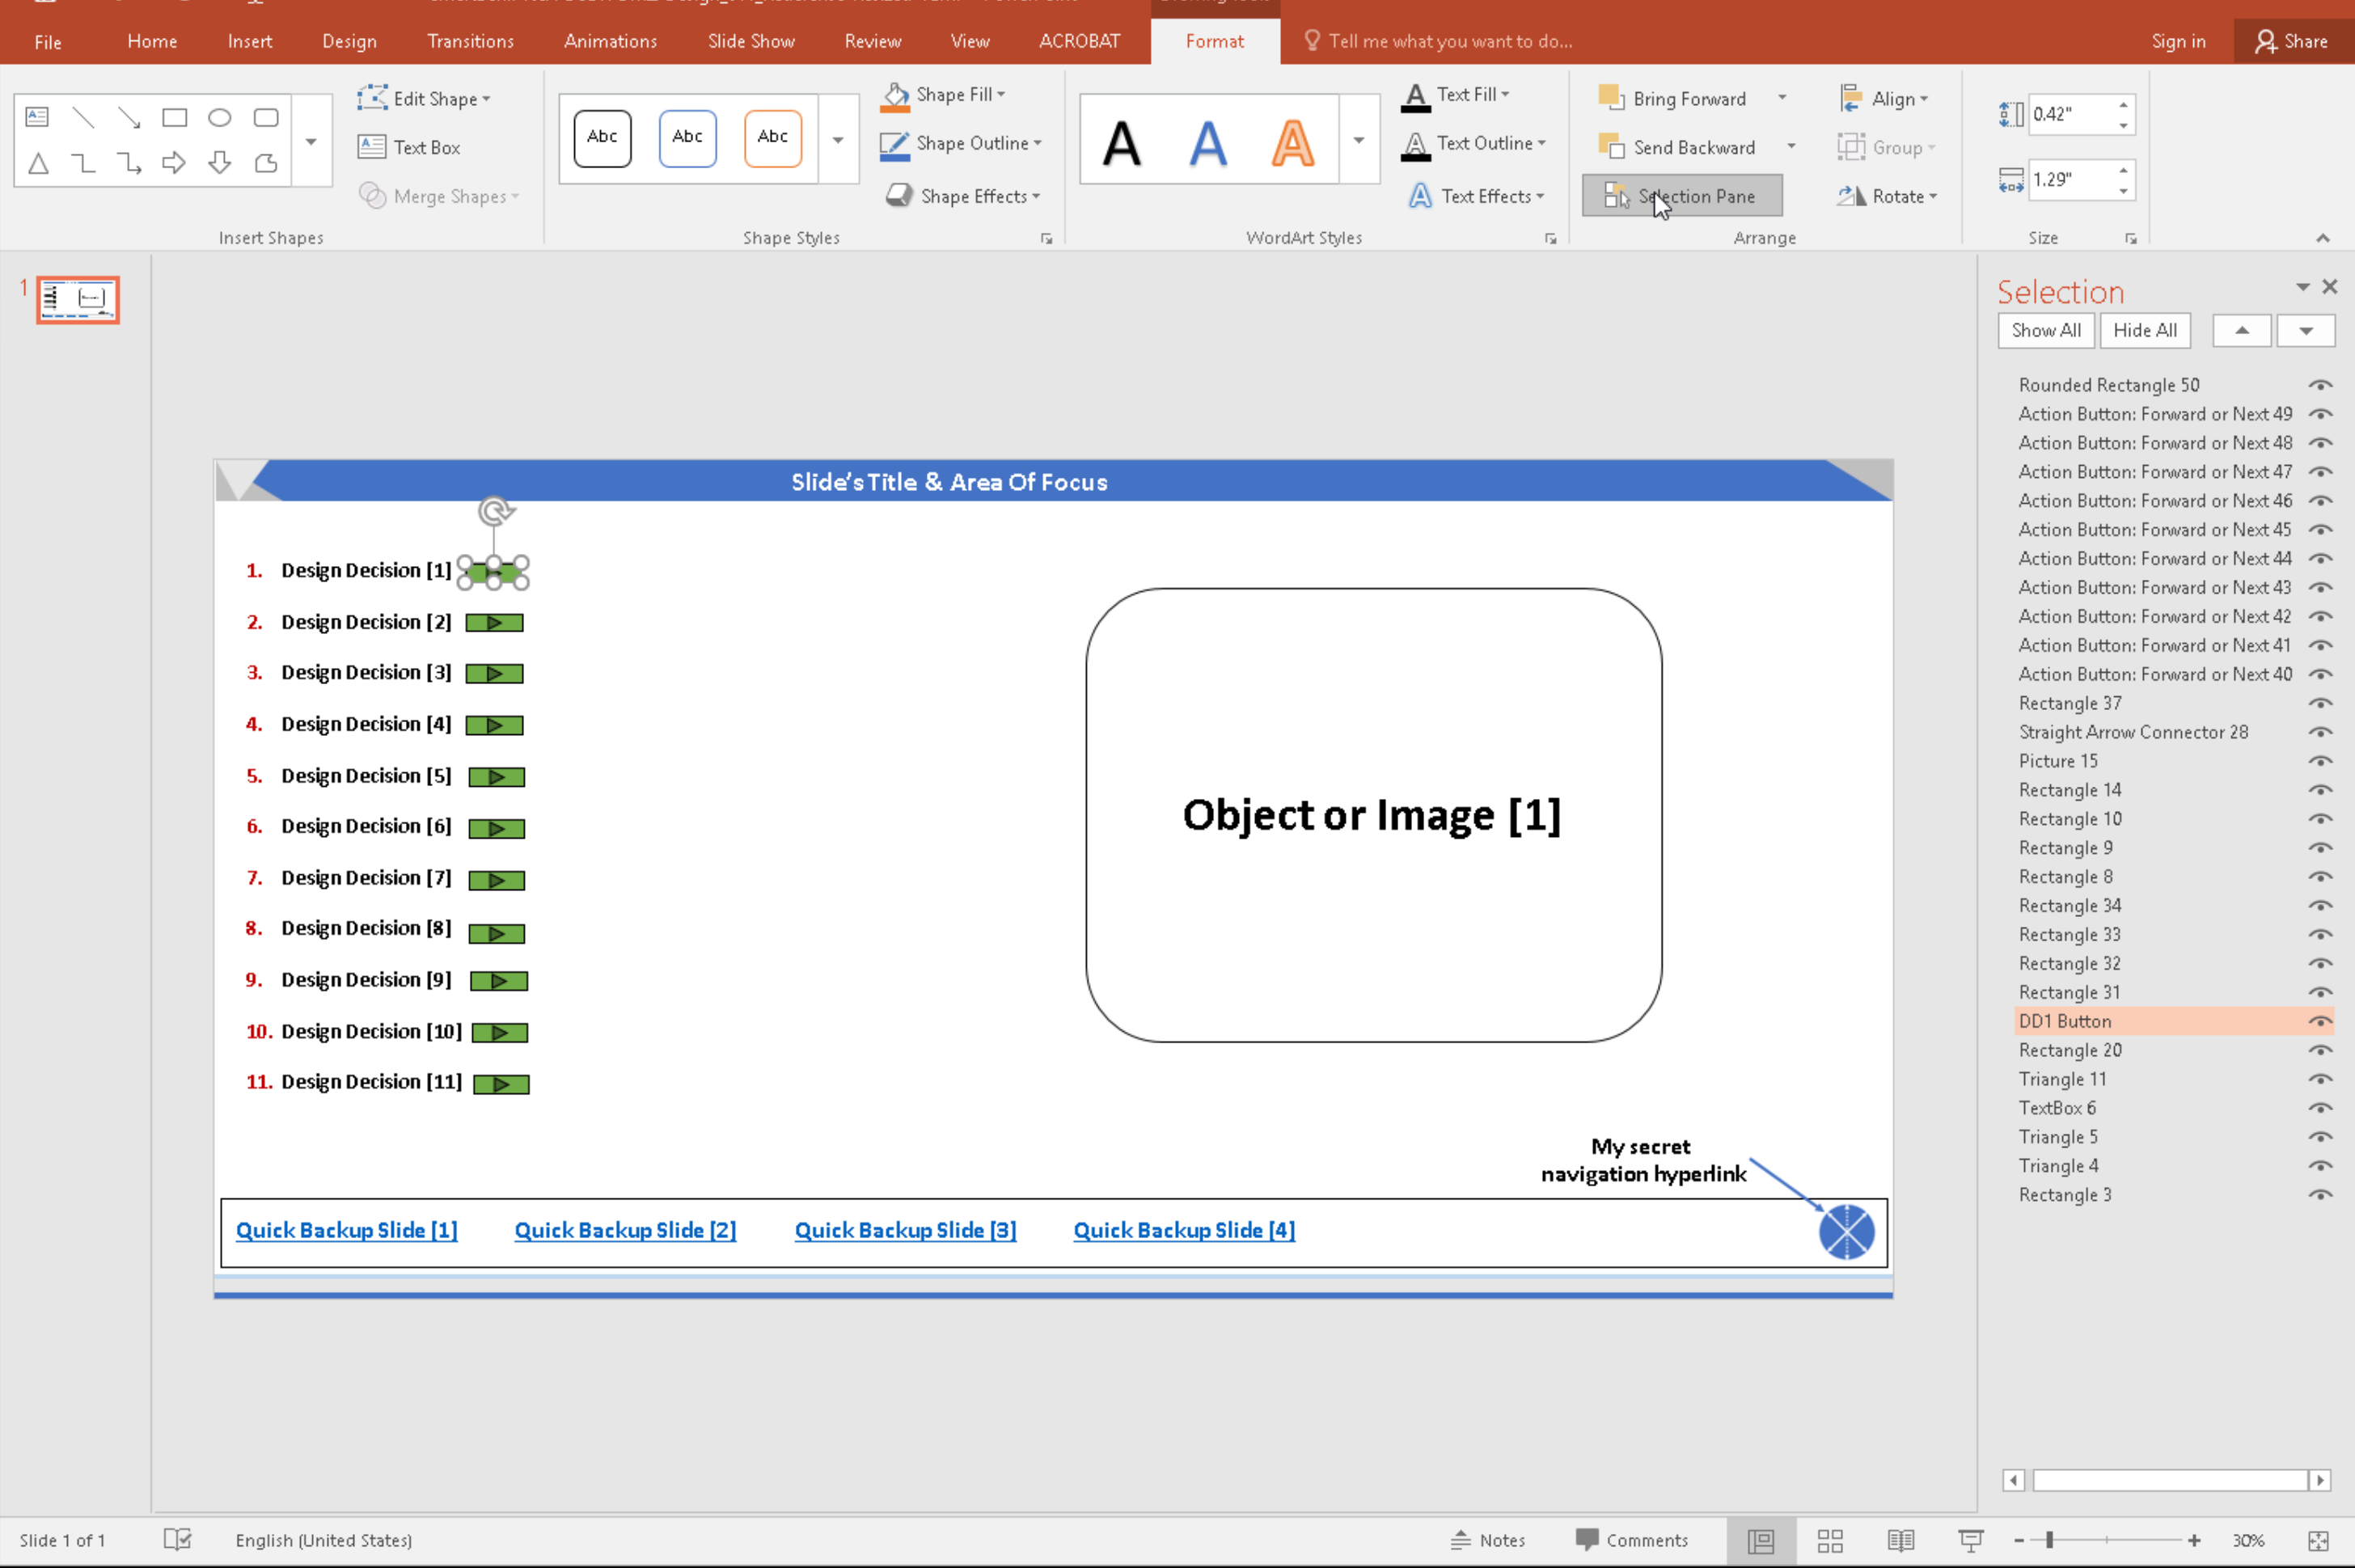
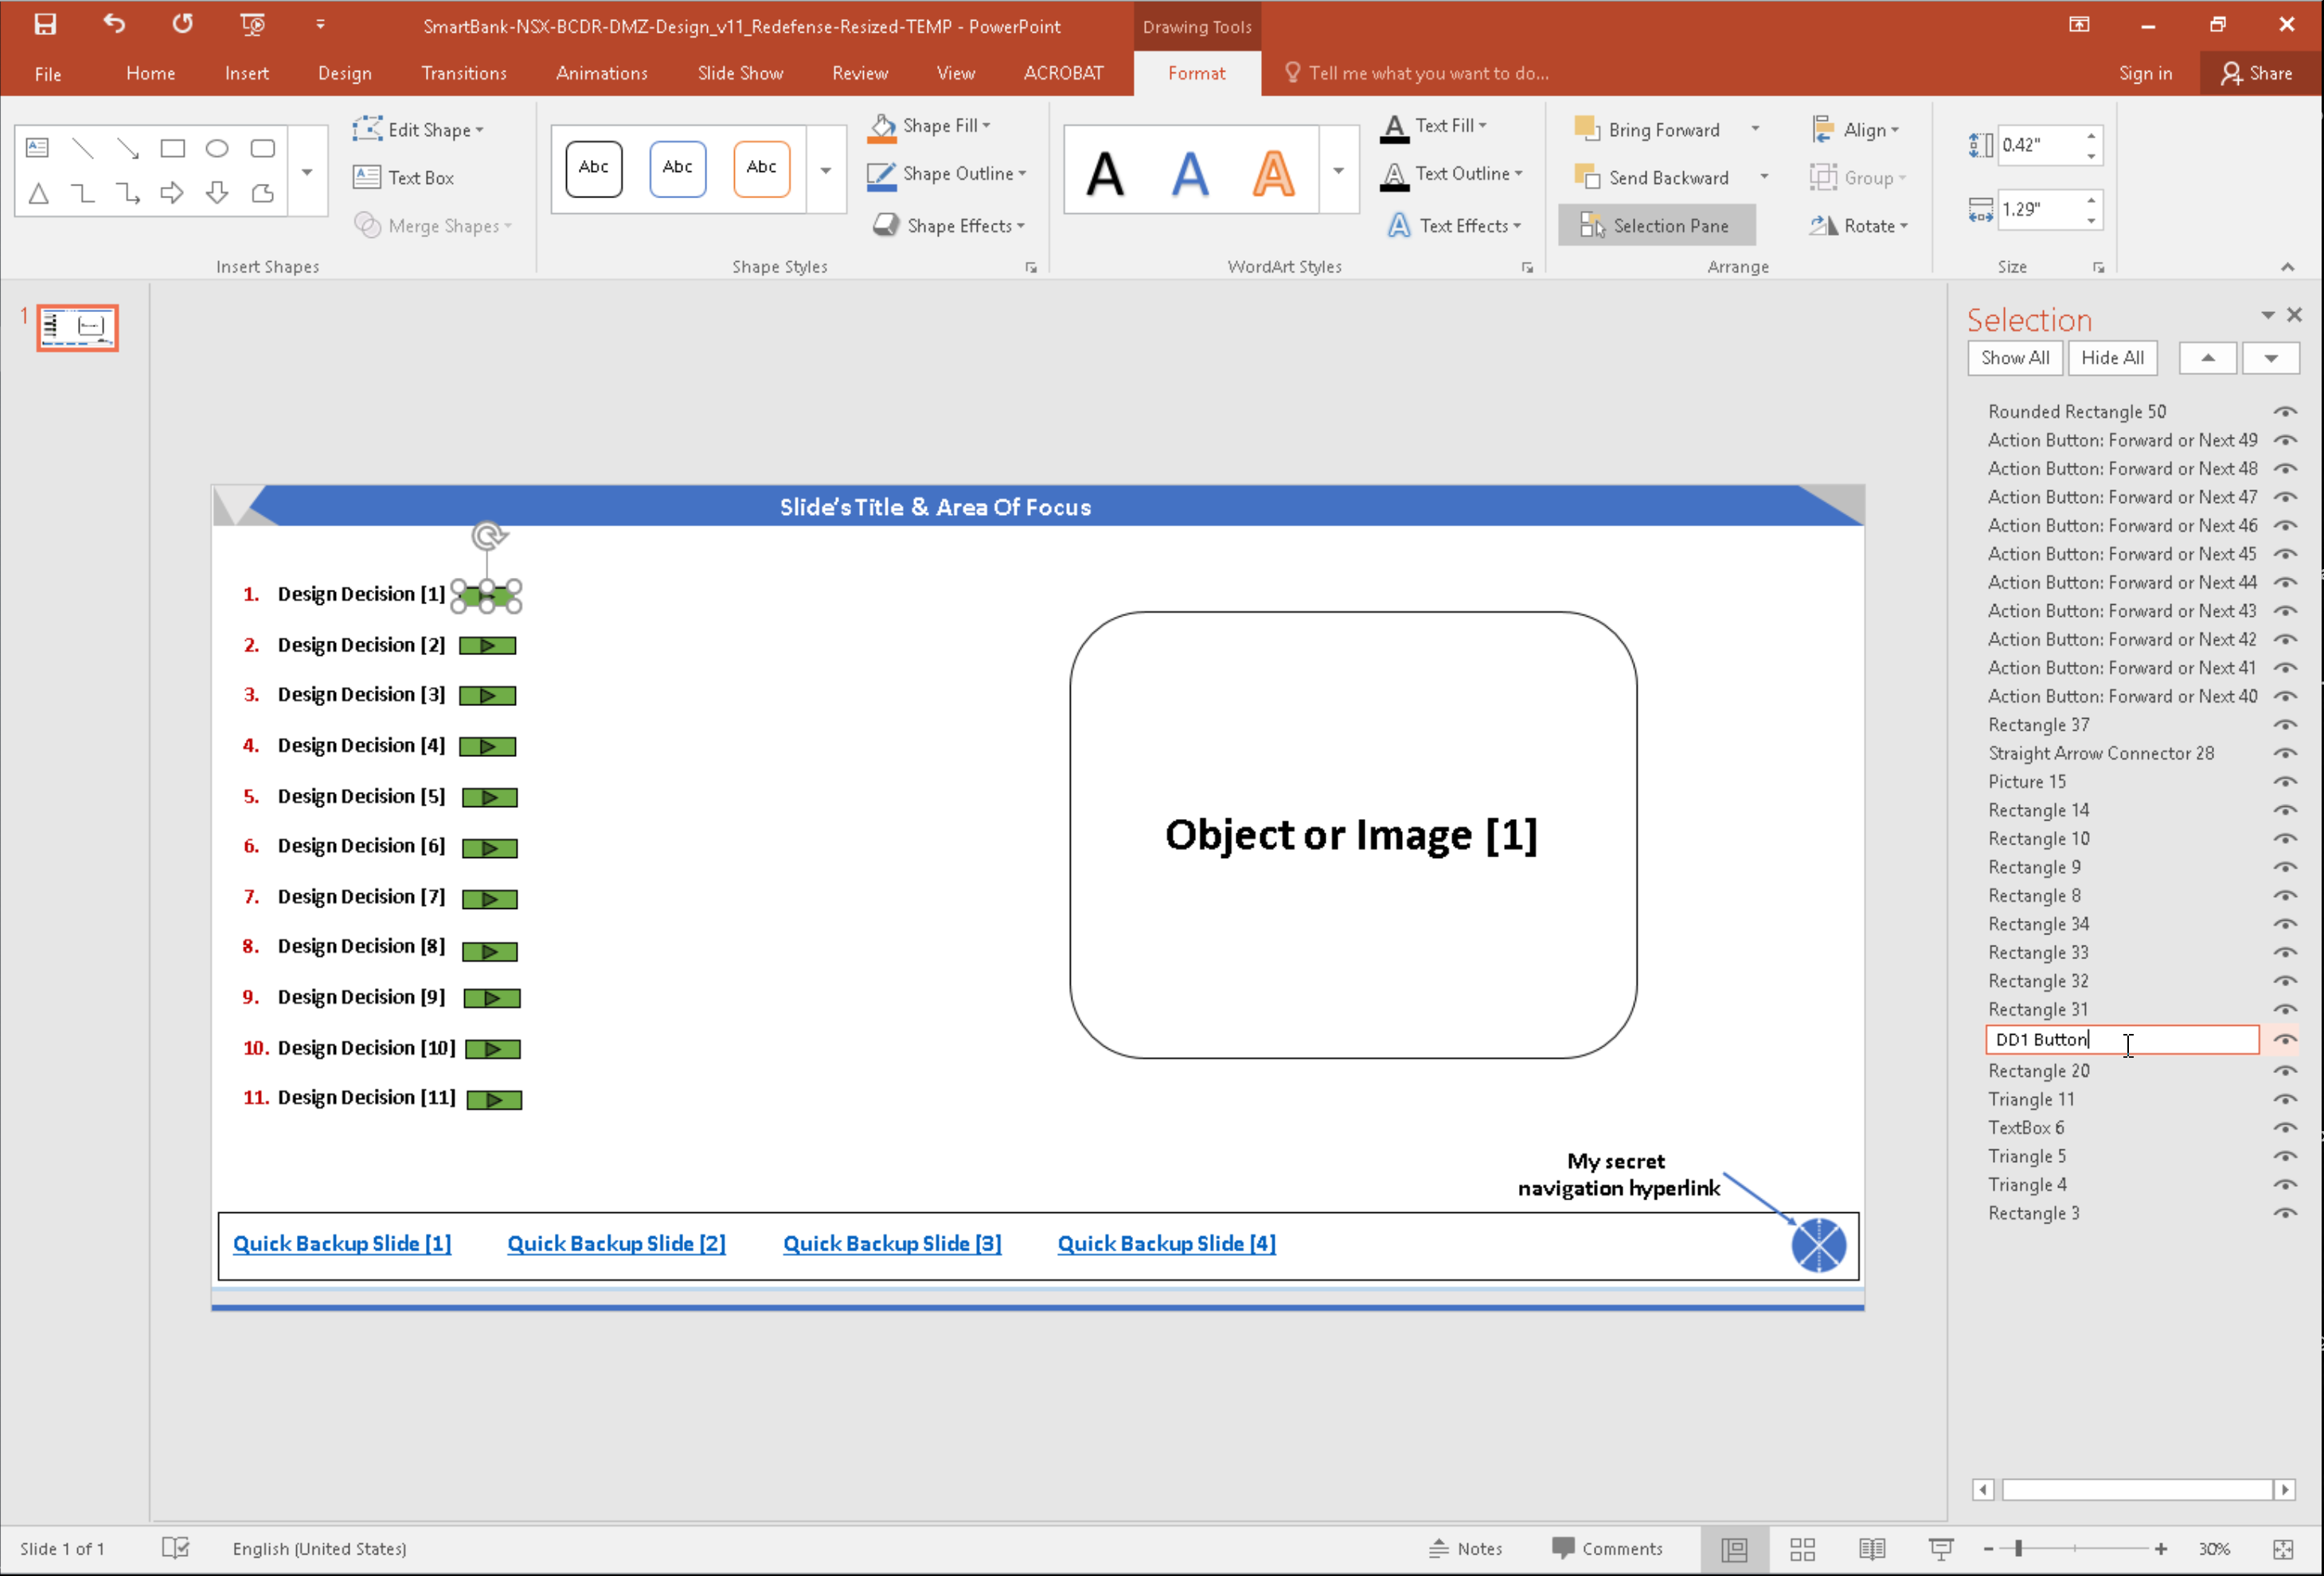
As you’ve noticed in the slide, I have my design decisions and I have the objects next to them, when I first took this path all of the objects had the same name with a different number, again I did a quick research and found out that it is possible to change this as well, and this can be done via:
- Going to the Format ribbon.
- Click on the Selection Pane.
- On the right you’ll find the pane opened and listed within it all of the objects found on that slide.
- Click on the object and it will be highlighted within the pane.
- Click on the name in the pane and type the name you see fit (such as DD1 Object).
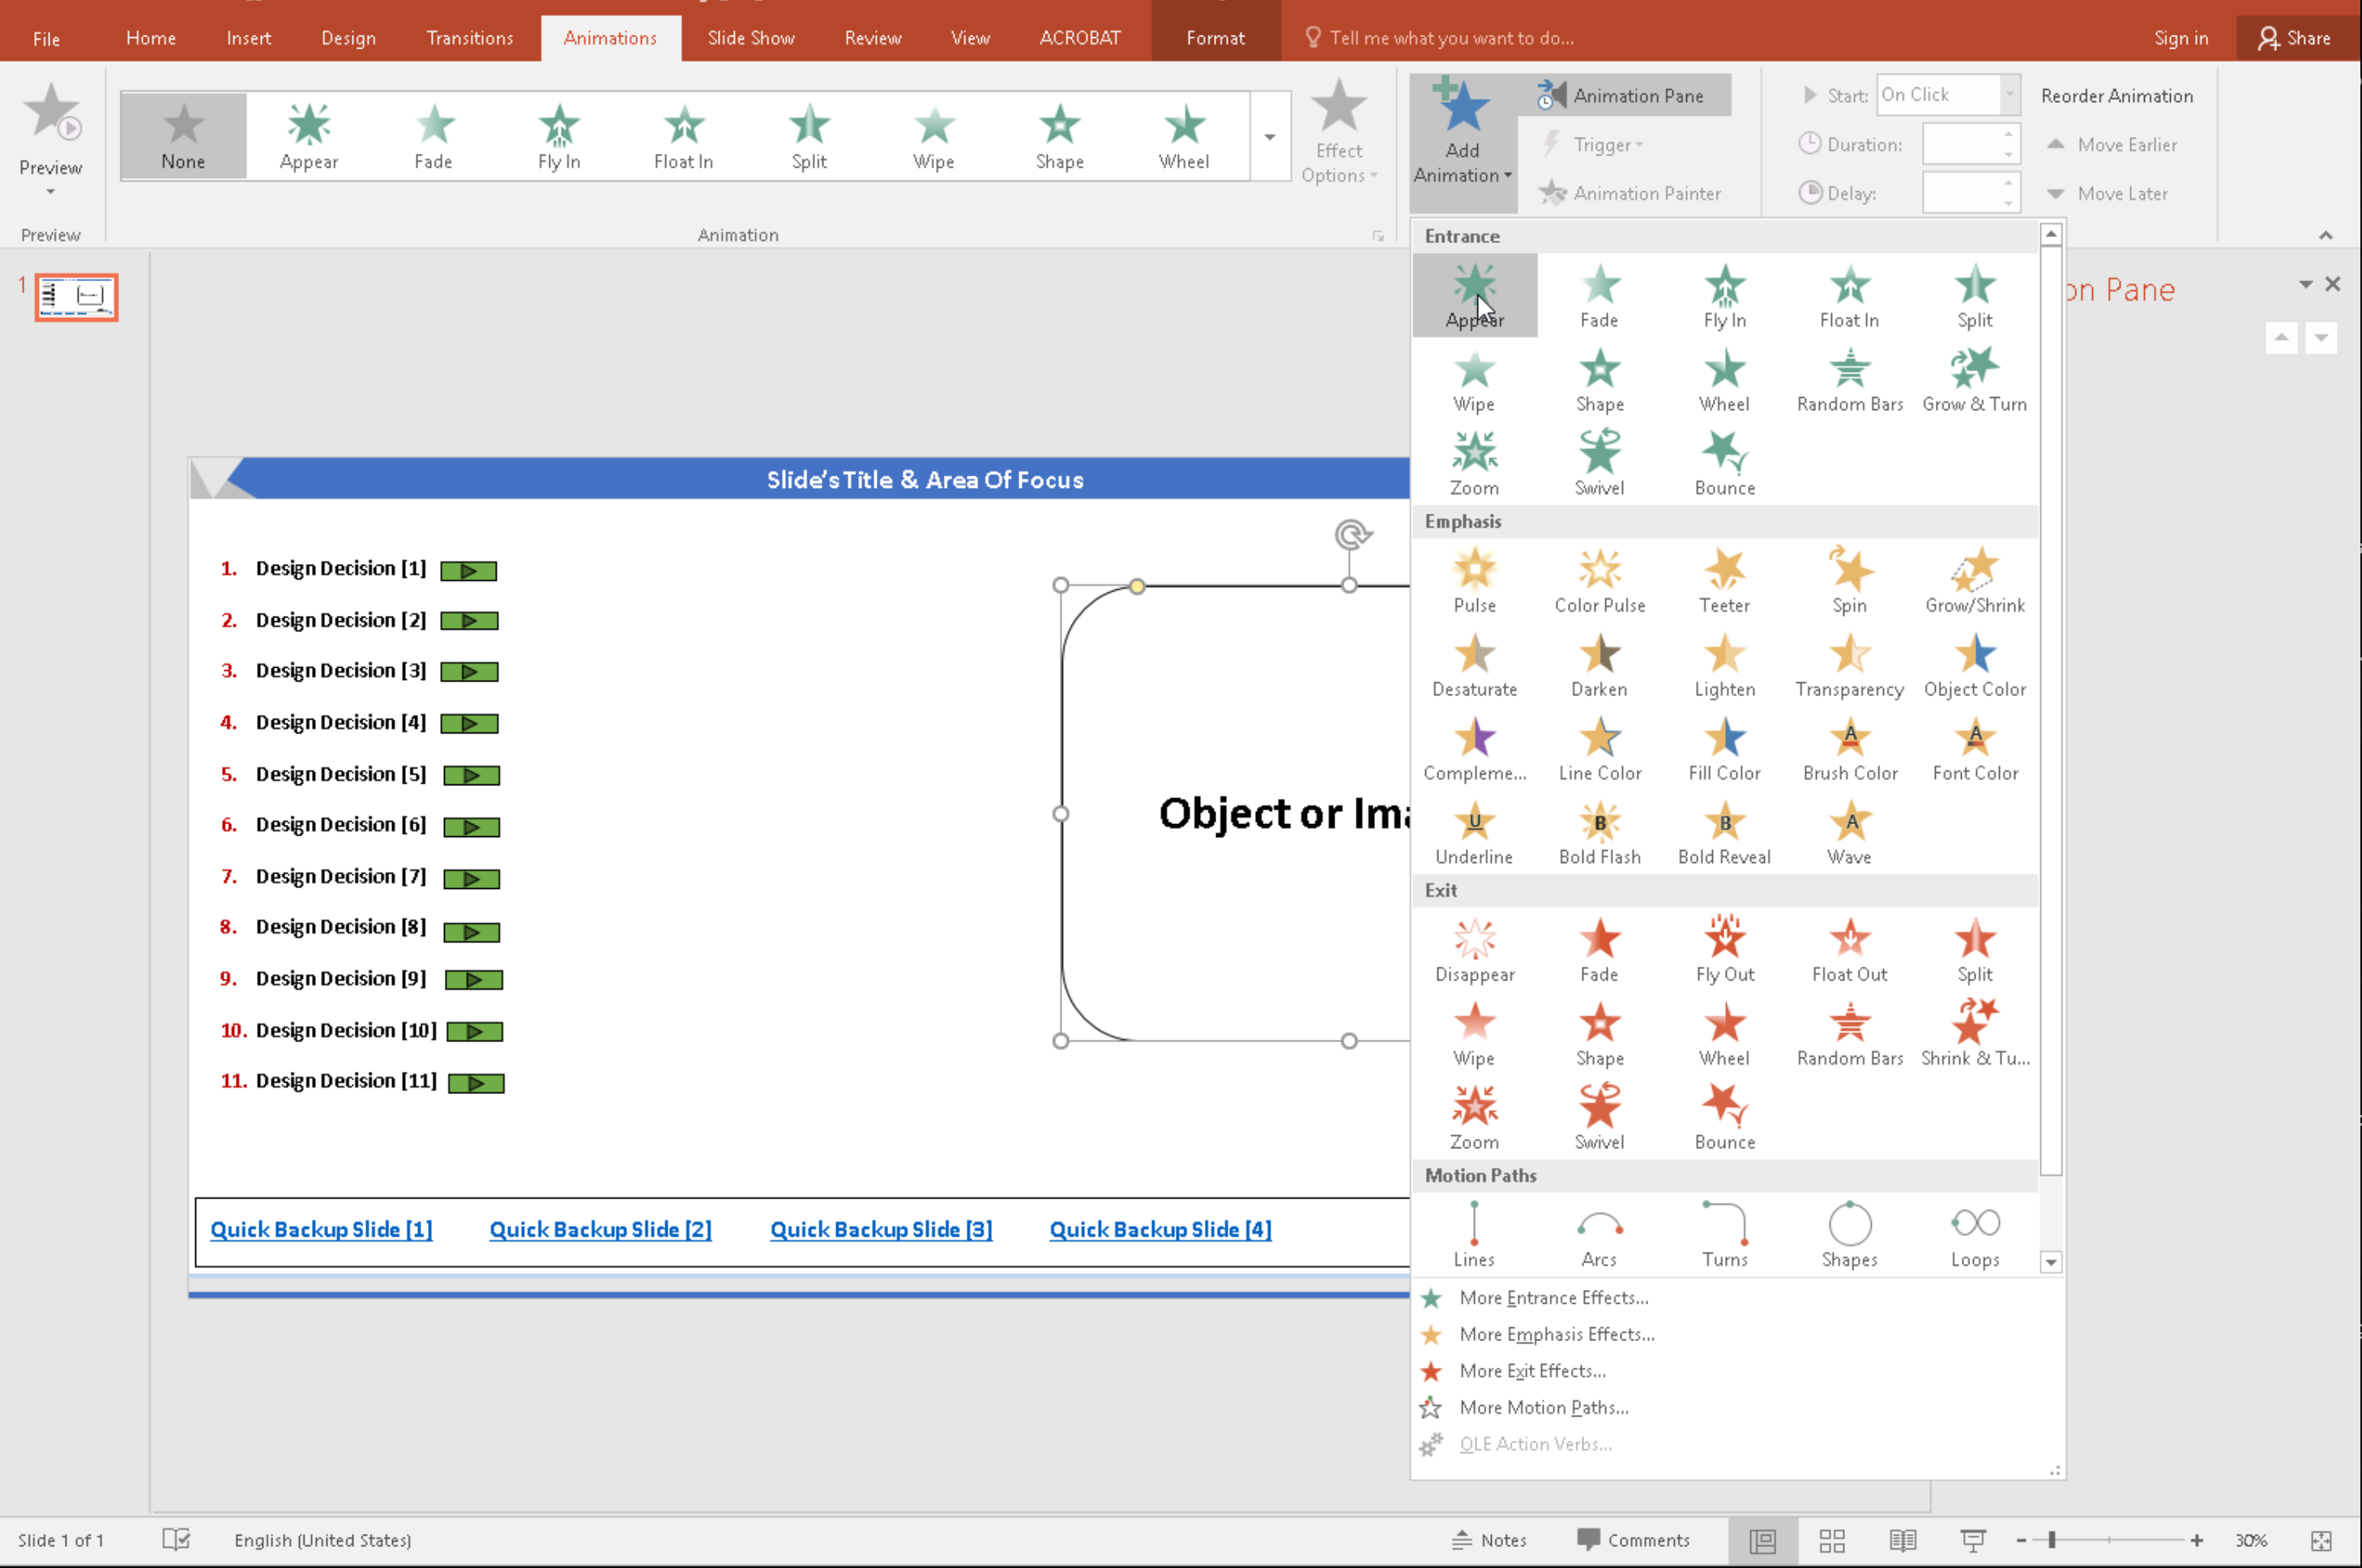
Now that you’ve labeled all of the objects, it’s time to bring in the images/diagrams and other objects that you want to show per design decision and animate them accordingly:
- Add the object.
- Click on the Animation ribbon.
- While you’re at it click on the Animation Pane too.
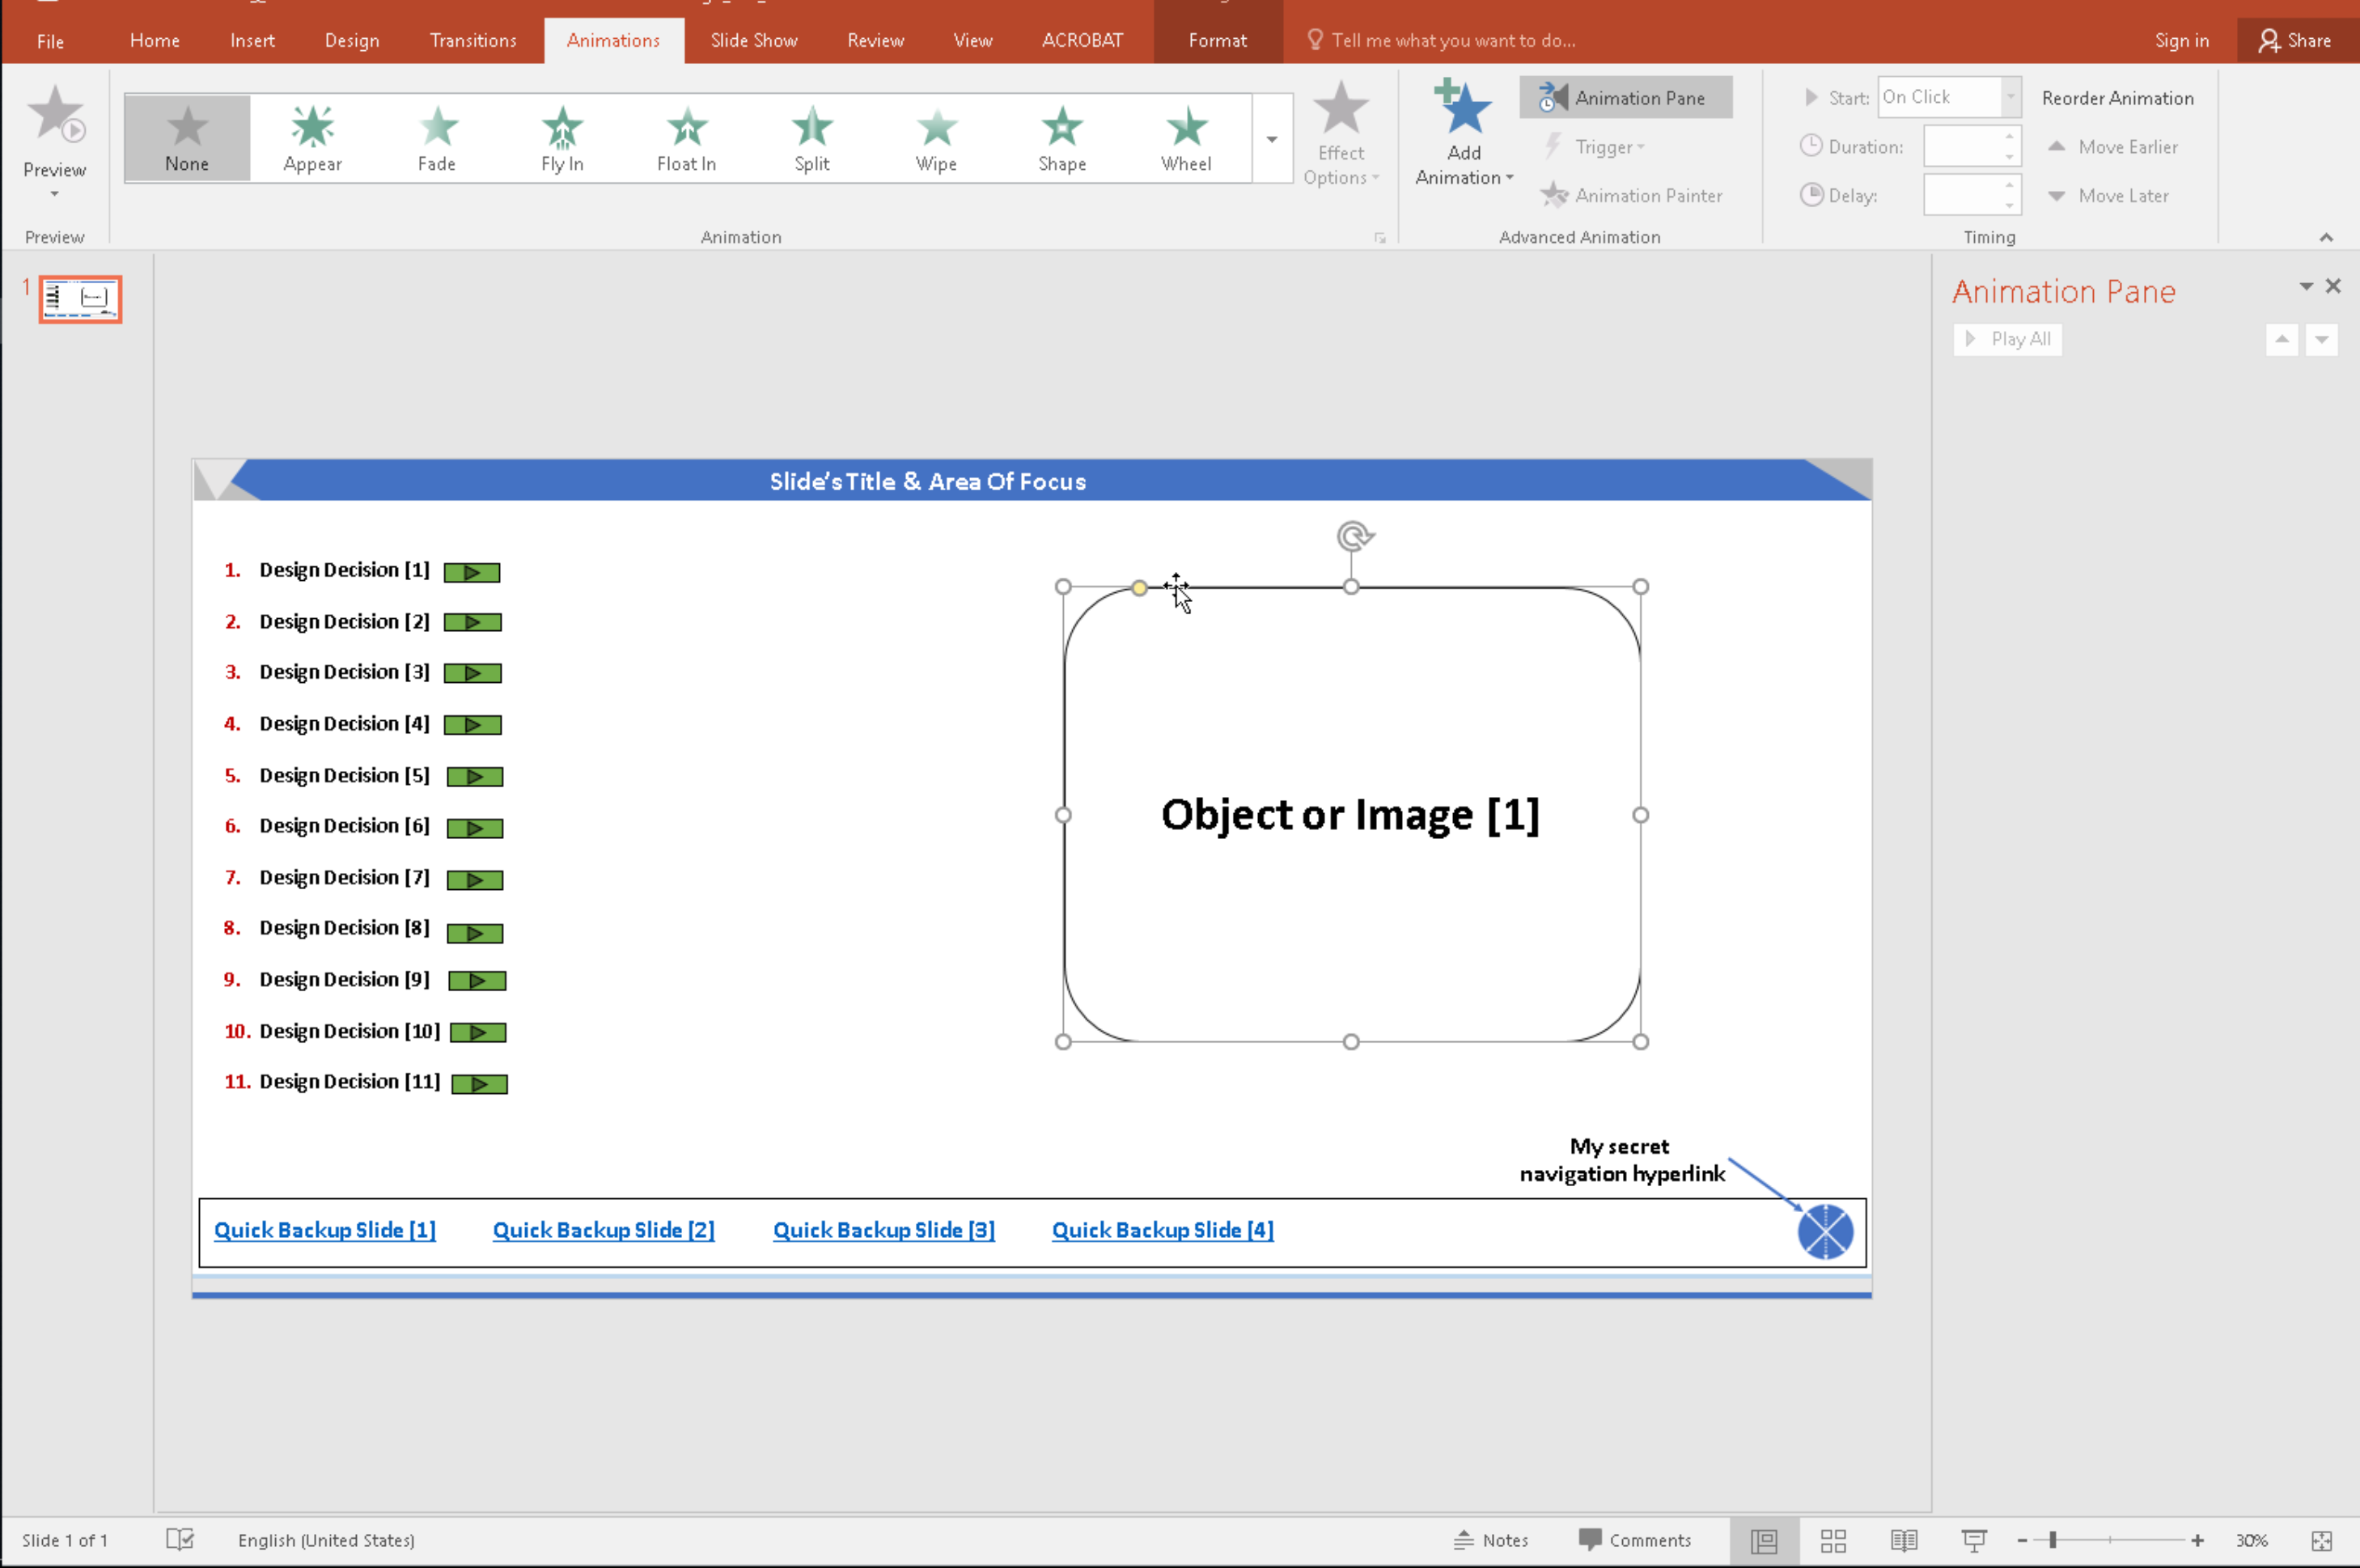
- Add the animation for the object to appear.
- Click on Add Animation.
- Select Appear.
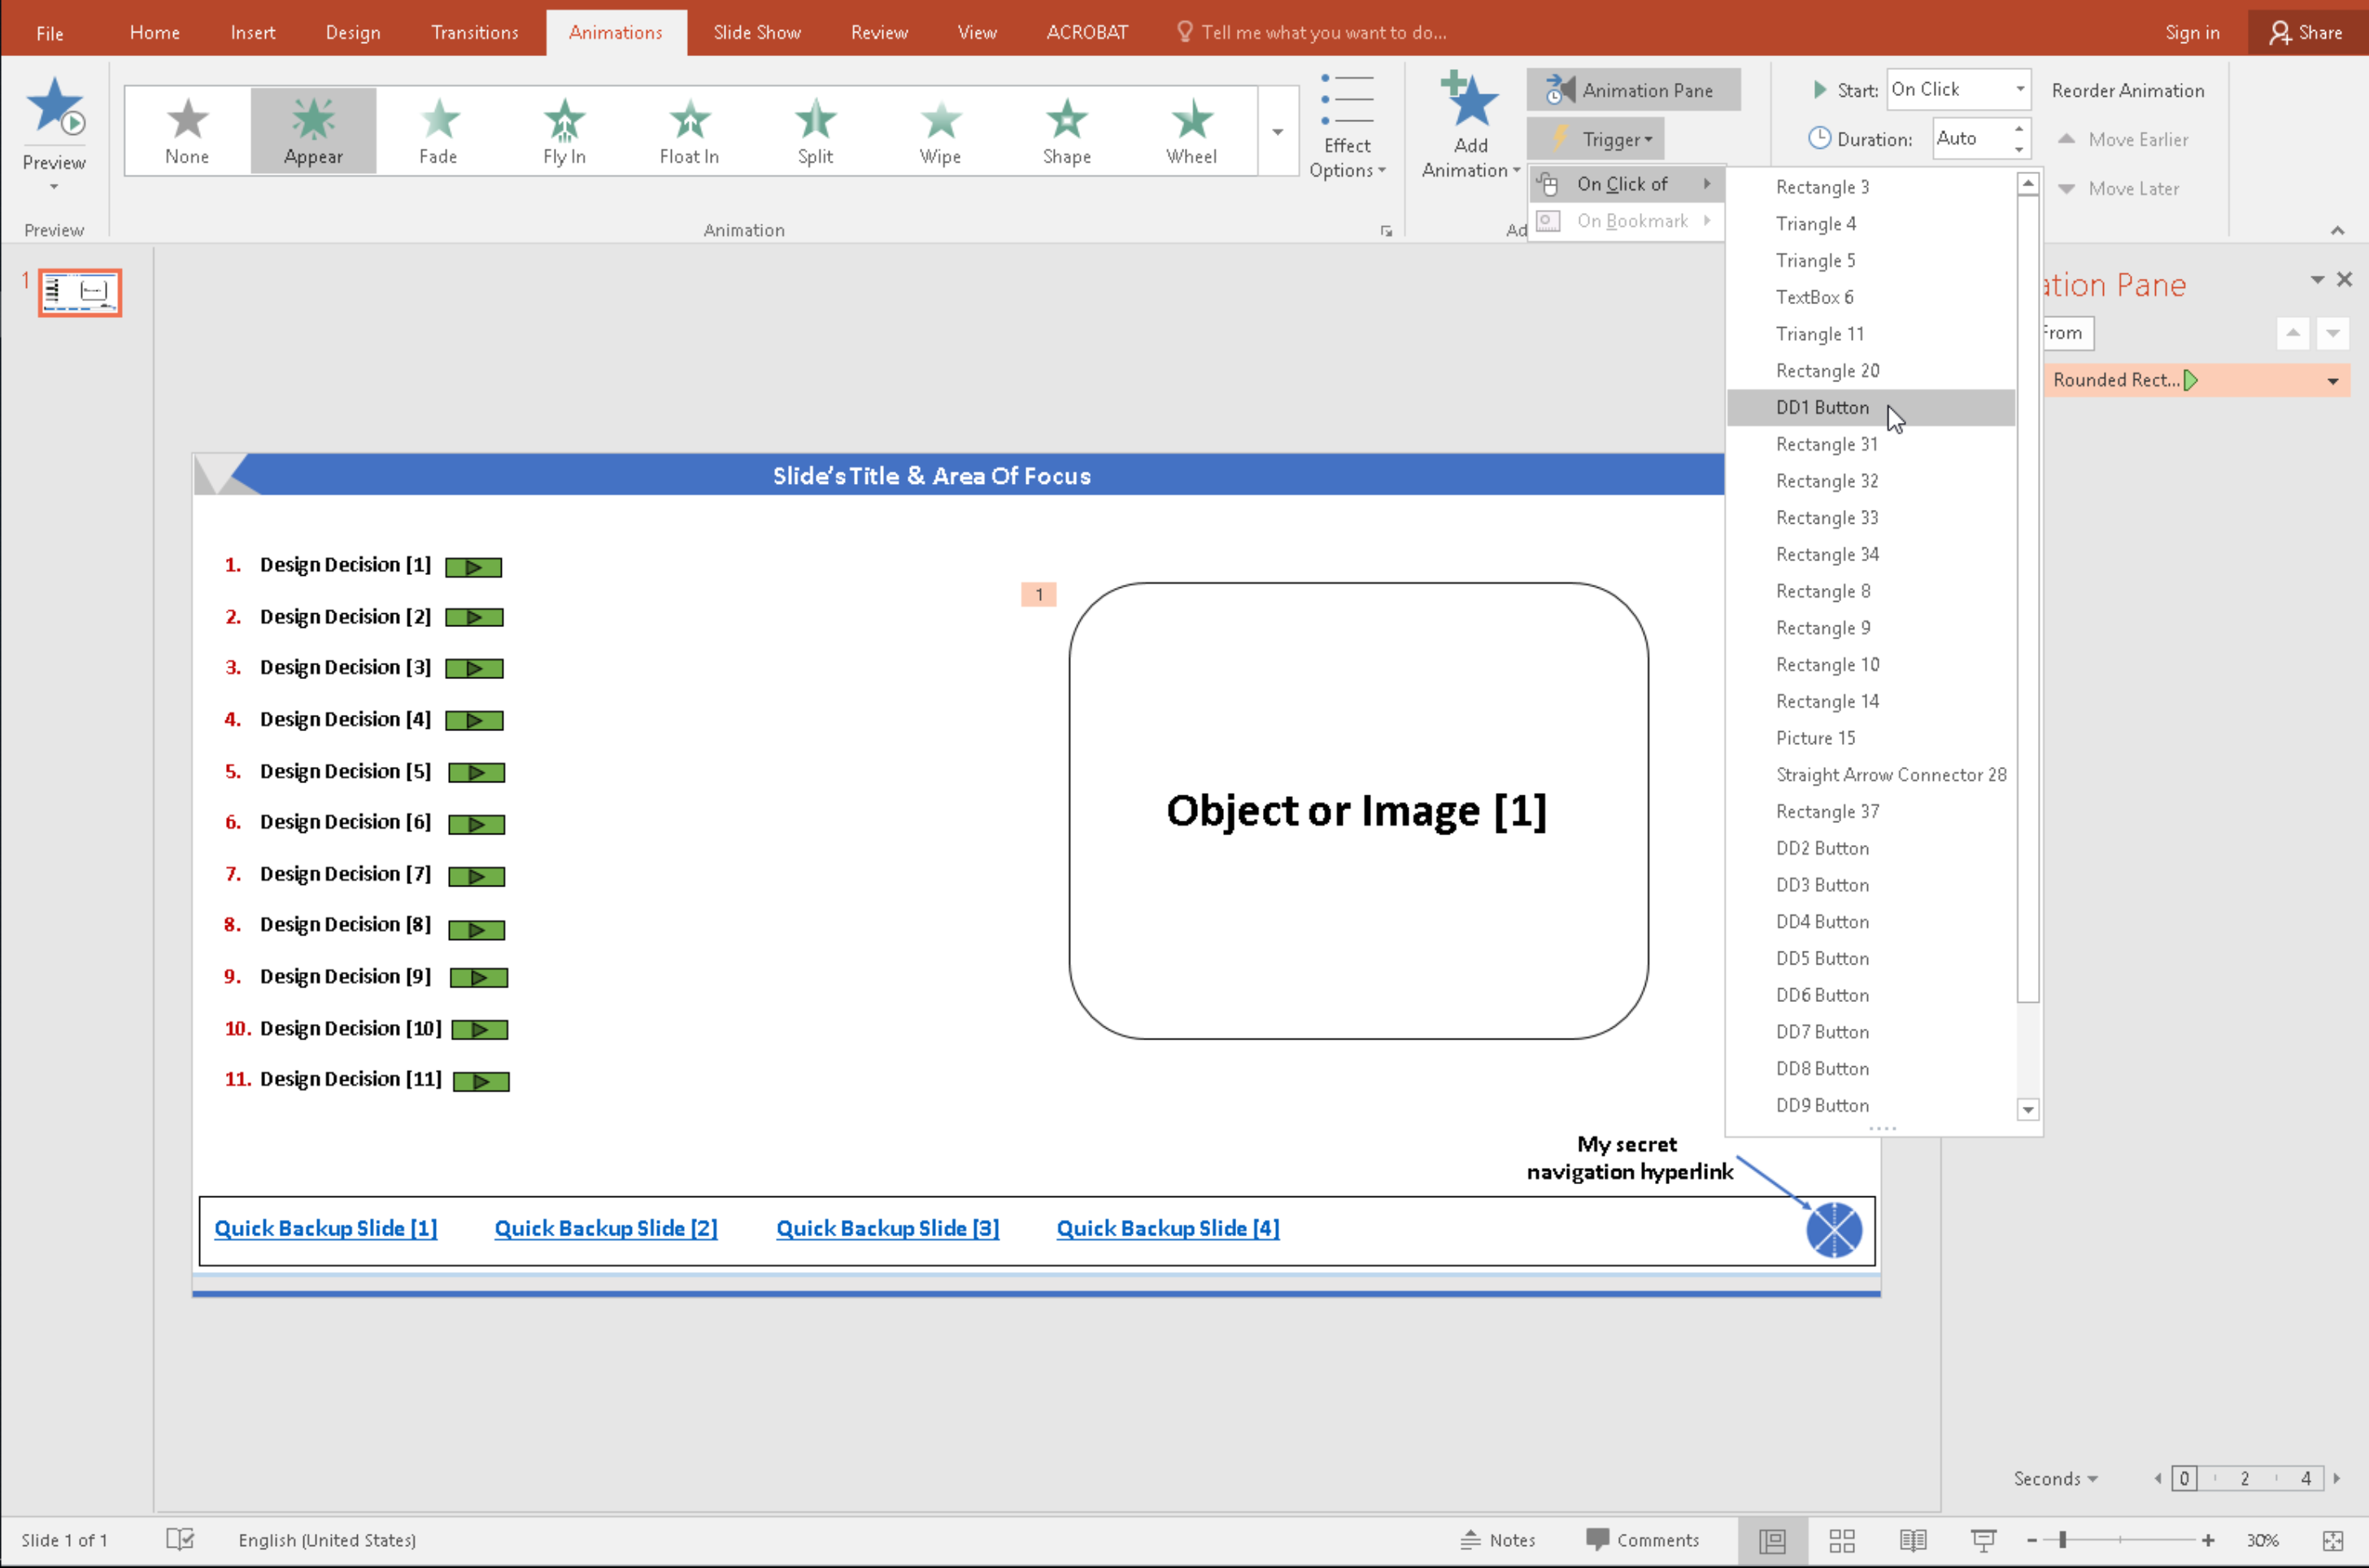
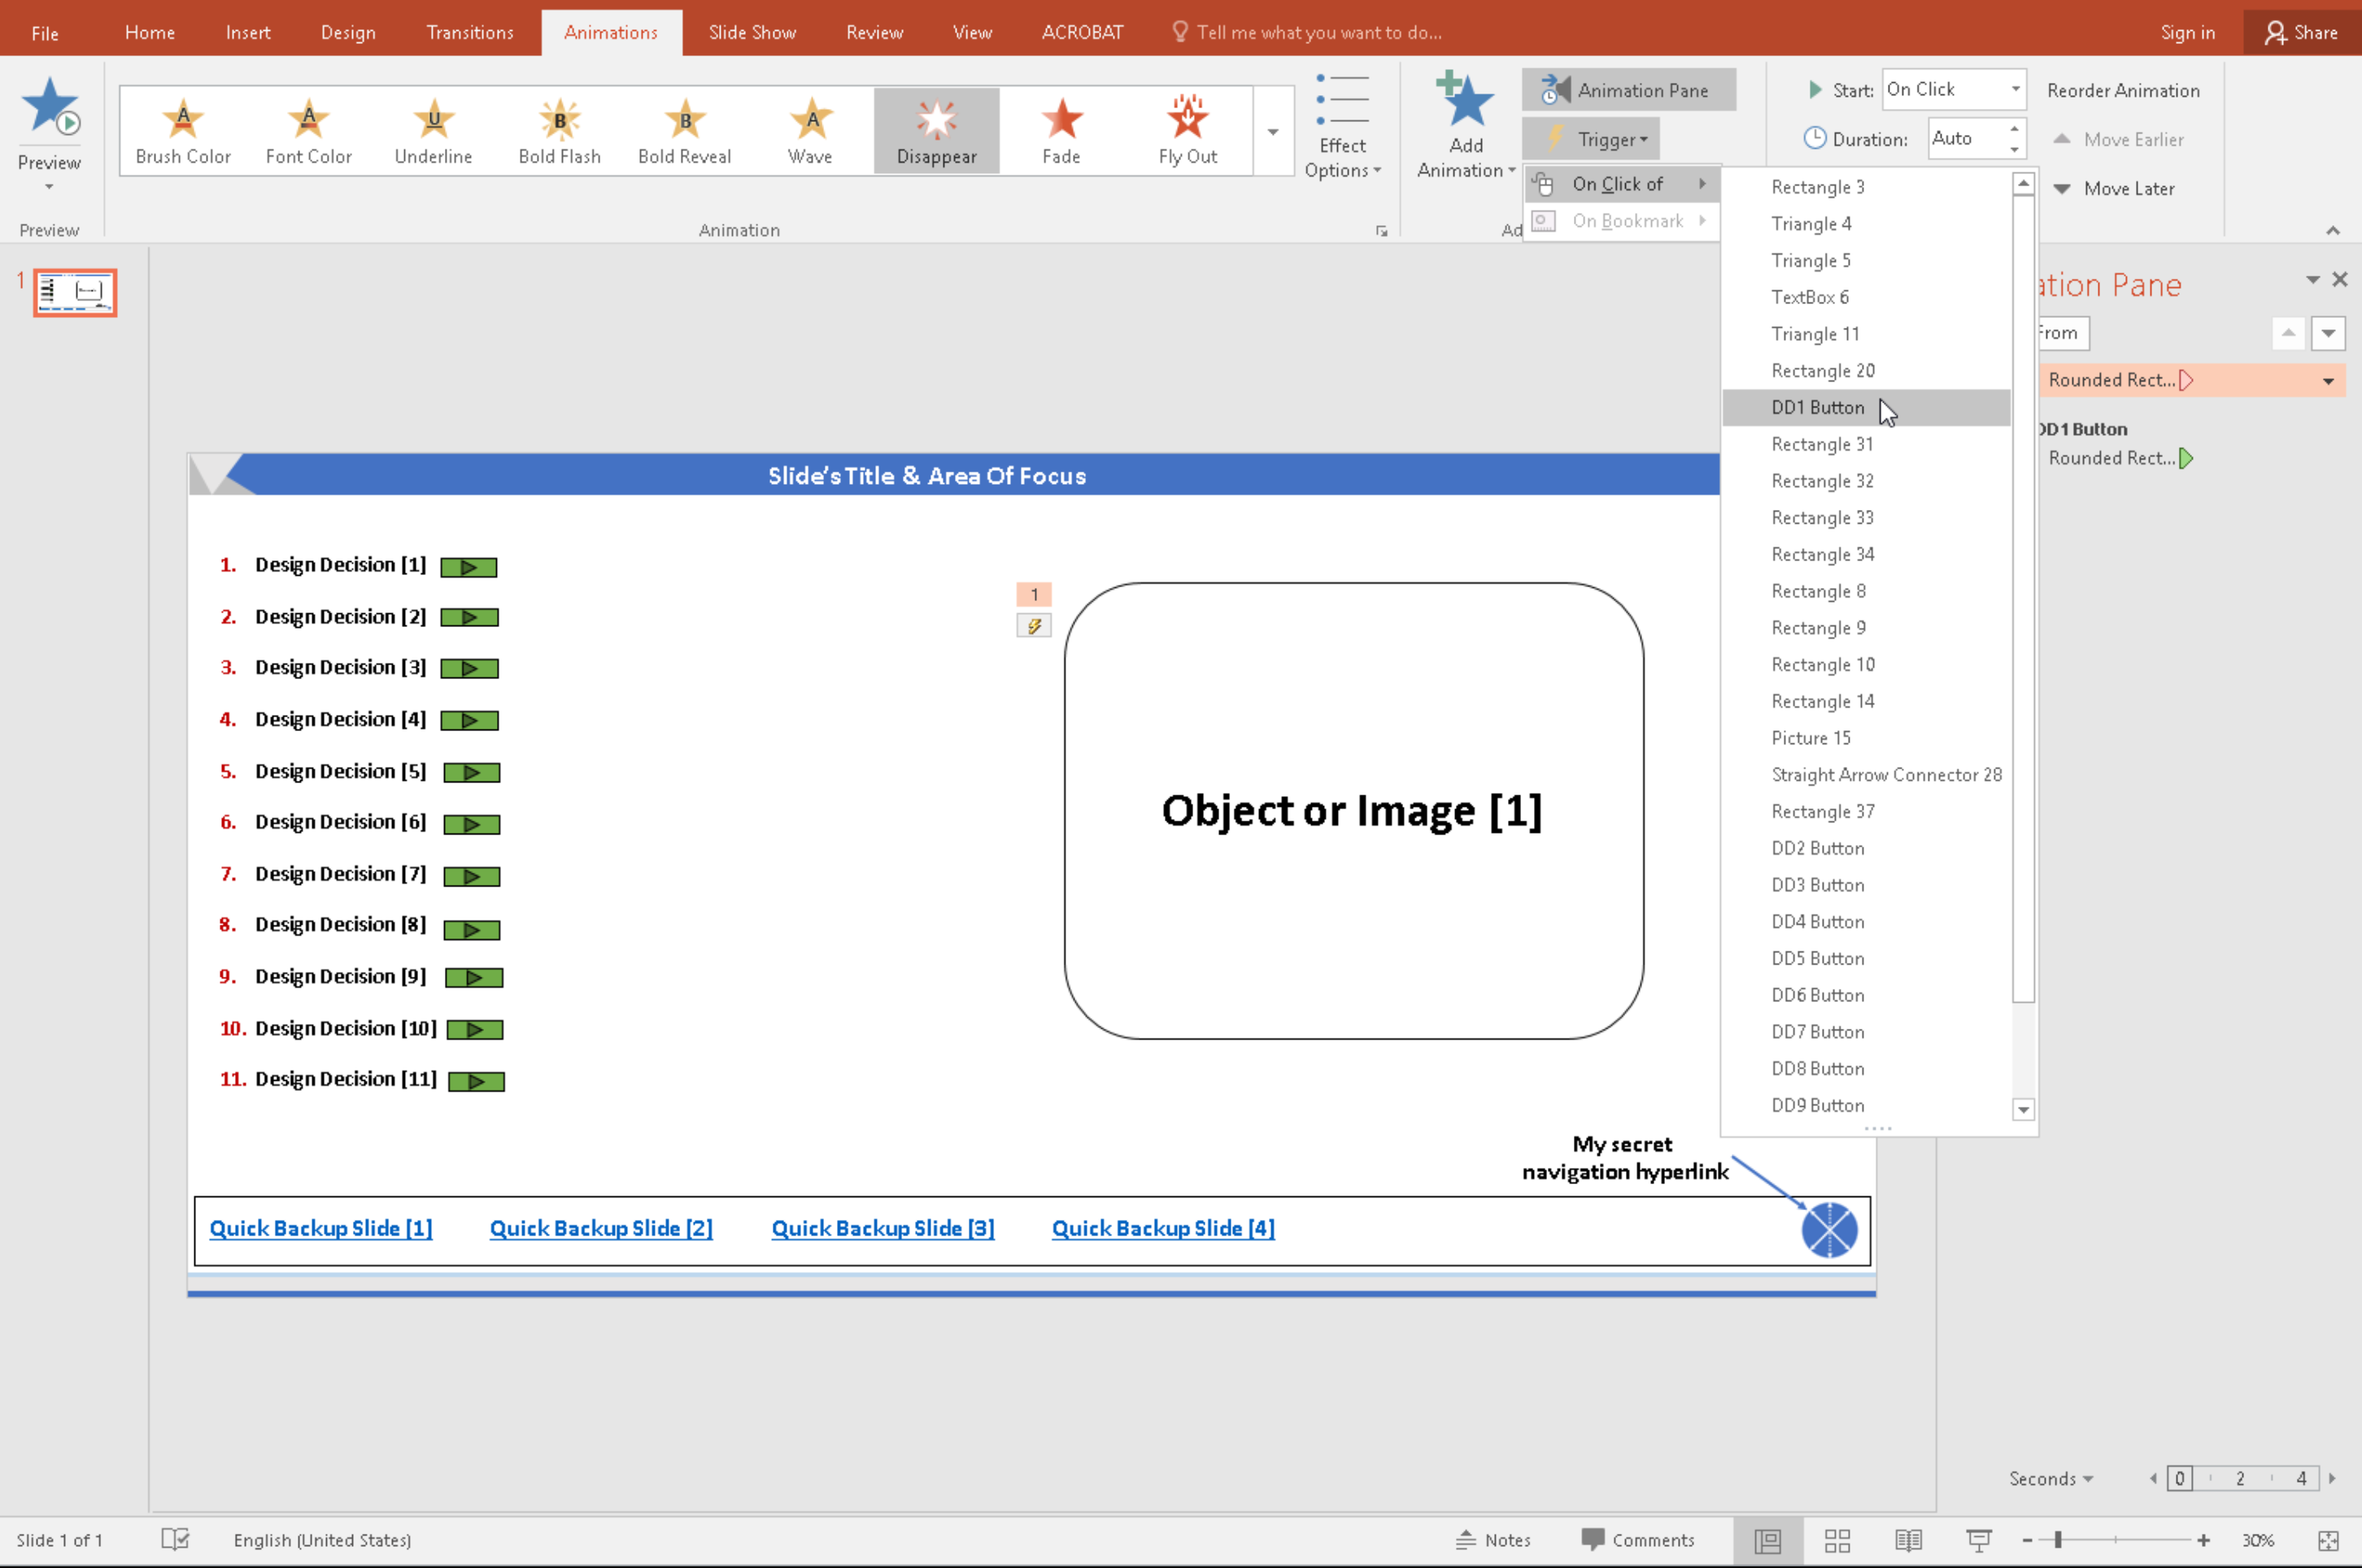
- Now we configure the trigger effect, so that the object would appear upon clicking on the trigger object and in the example its (DD1 Button).
- Click on Trigger.
- Click on On Click of.
- From the list, select the trigger object (DD1 Button).
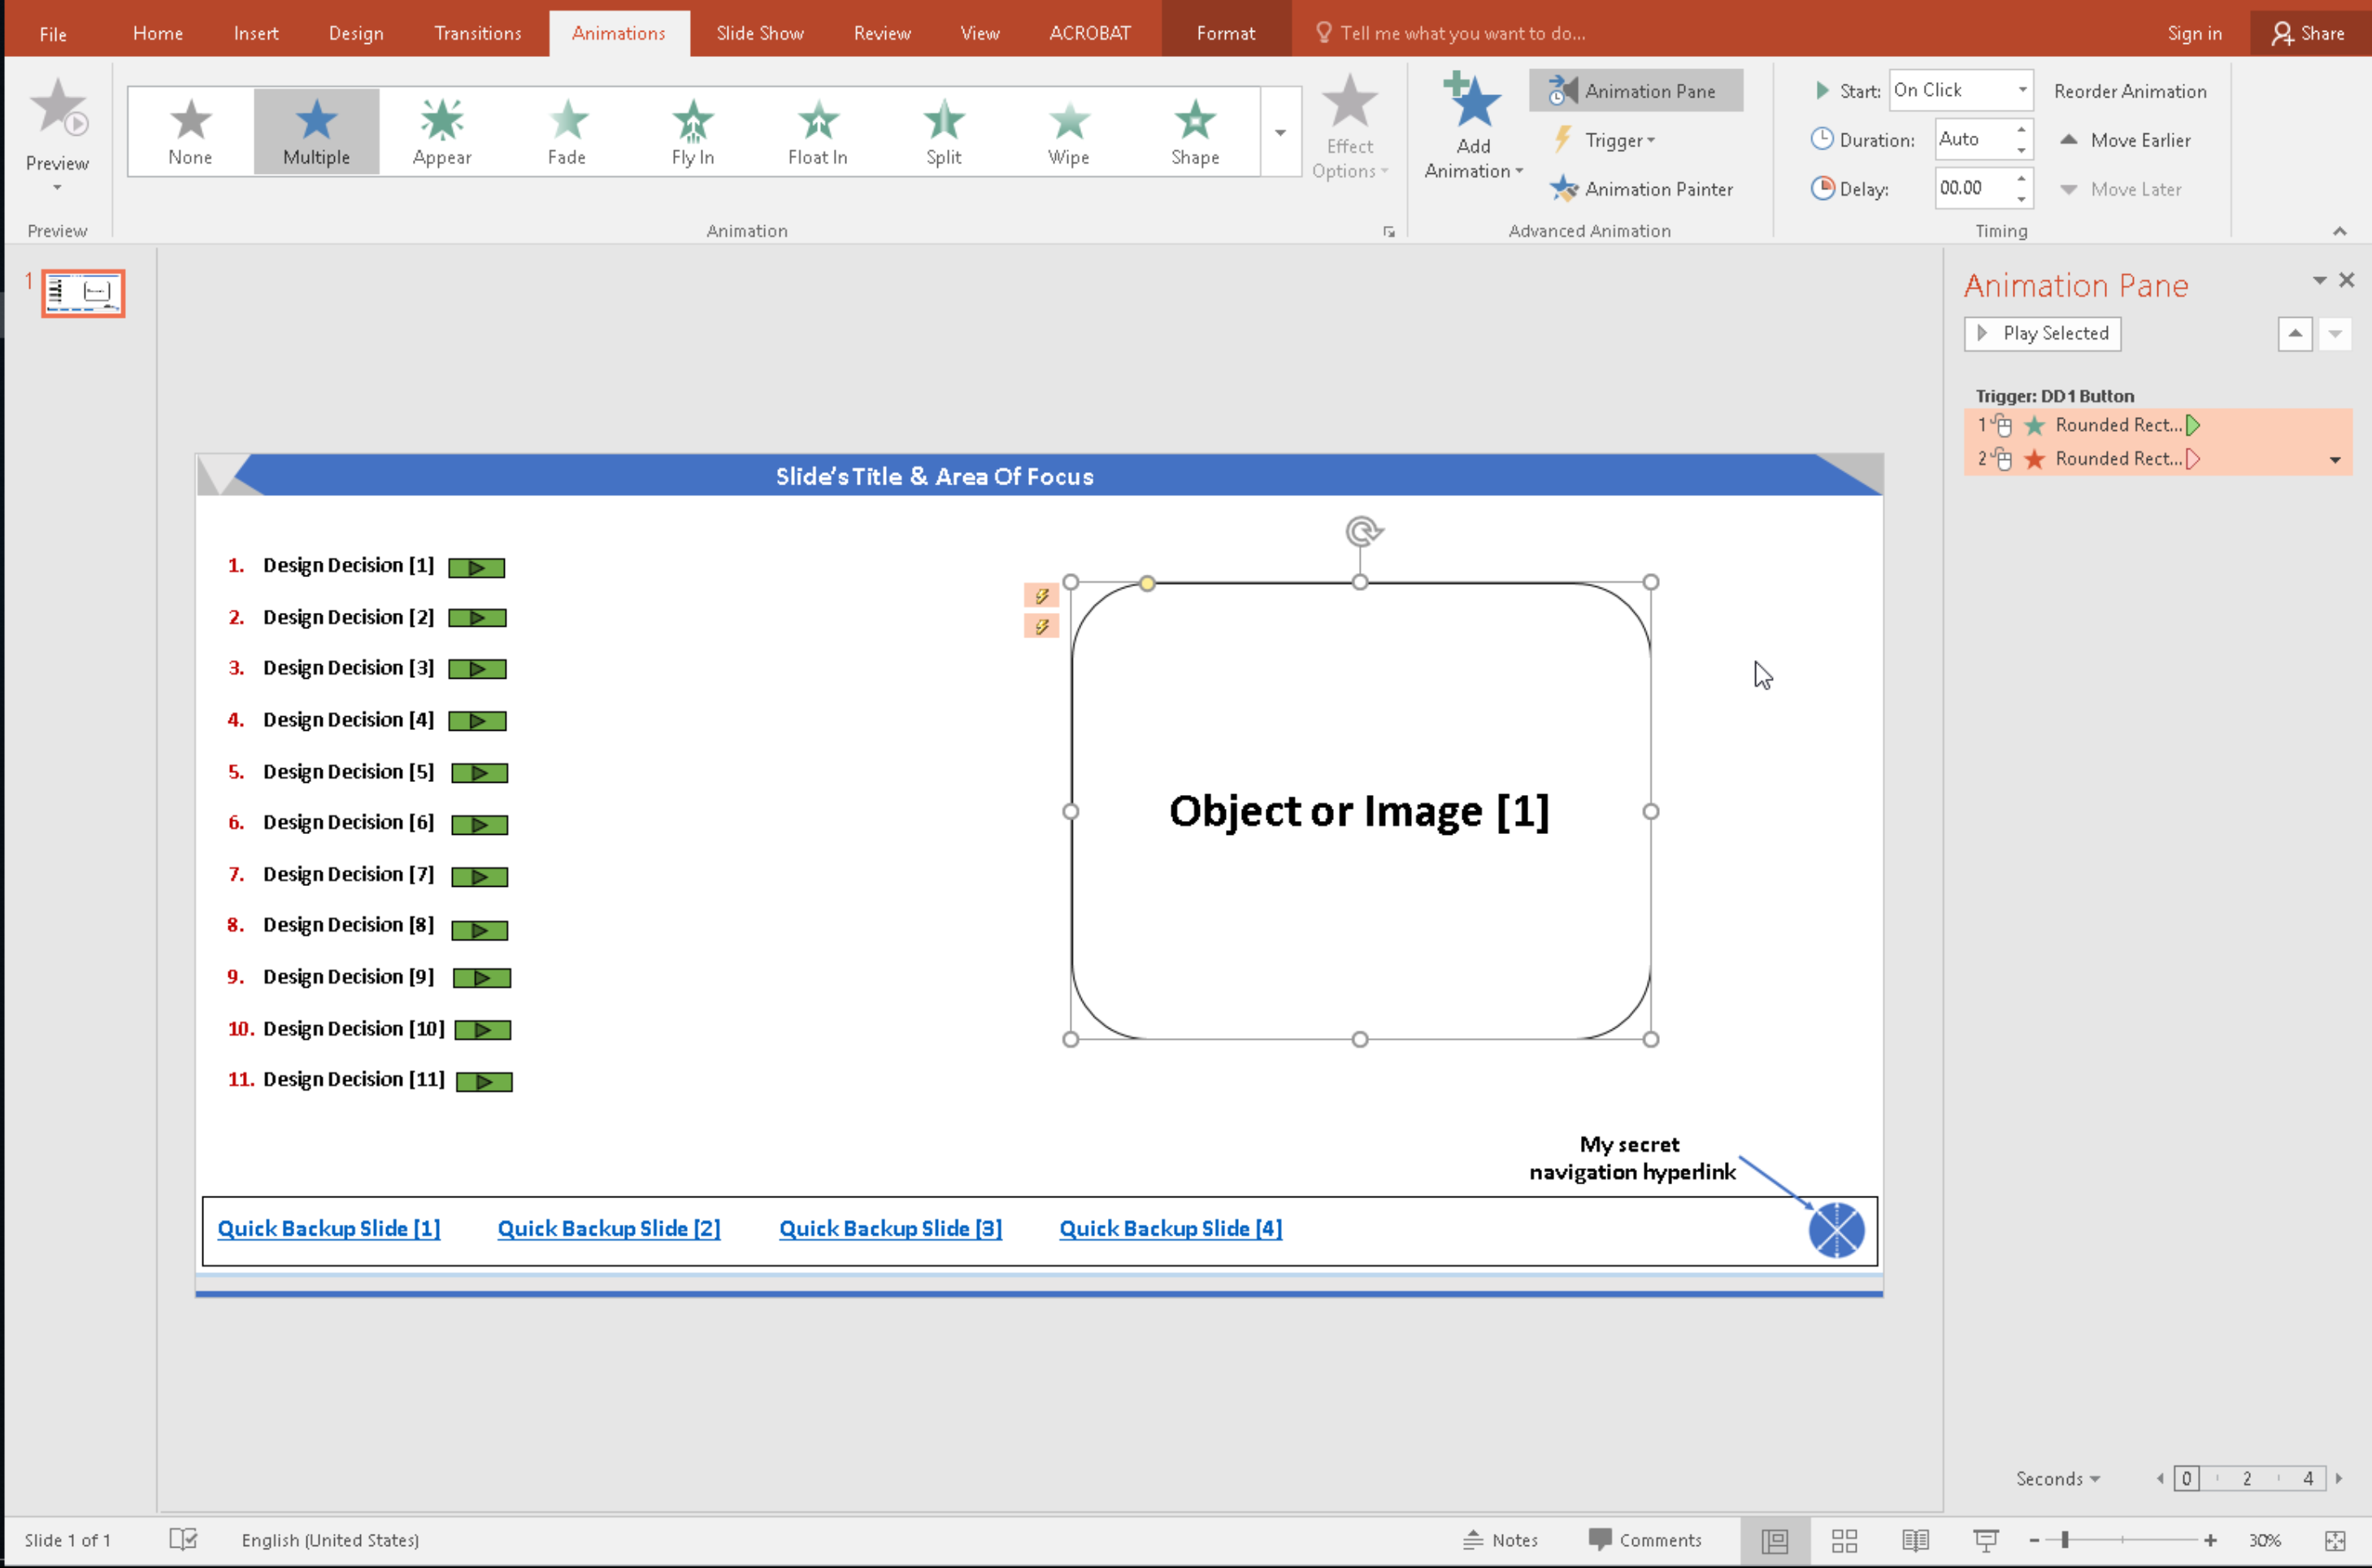
- Now we add the effect to hide the same object upon another trigger.
- Click on Add Animation.
- Select Disappear.
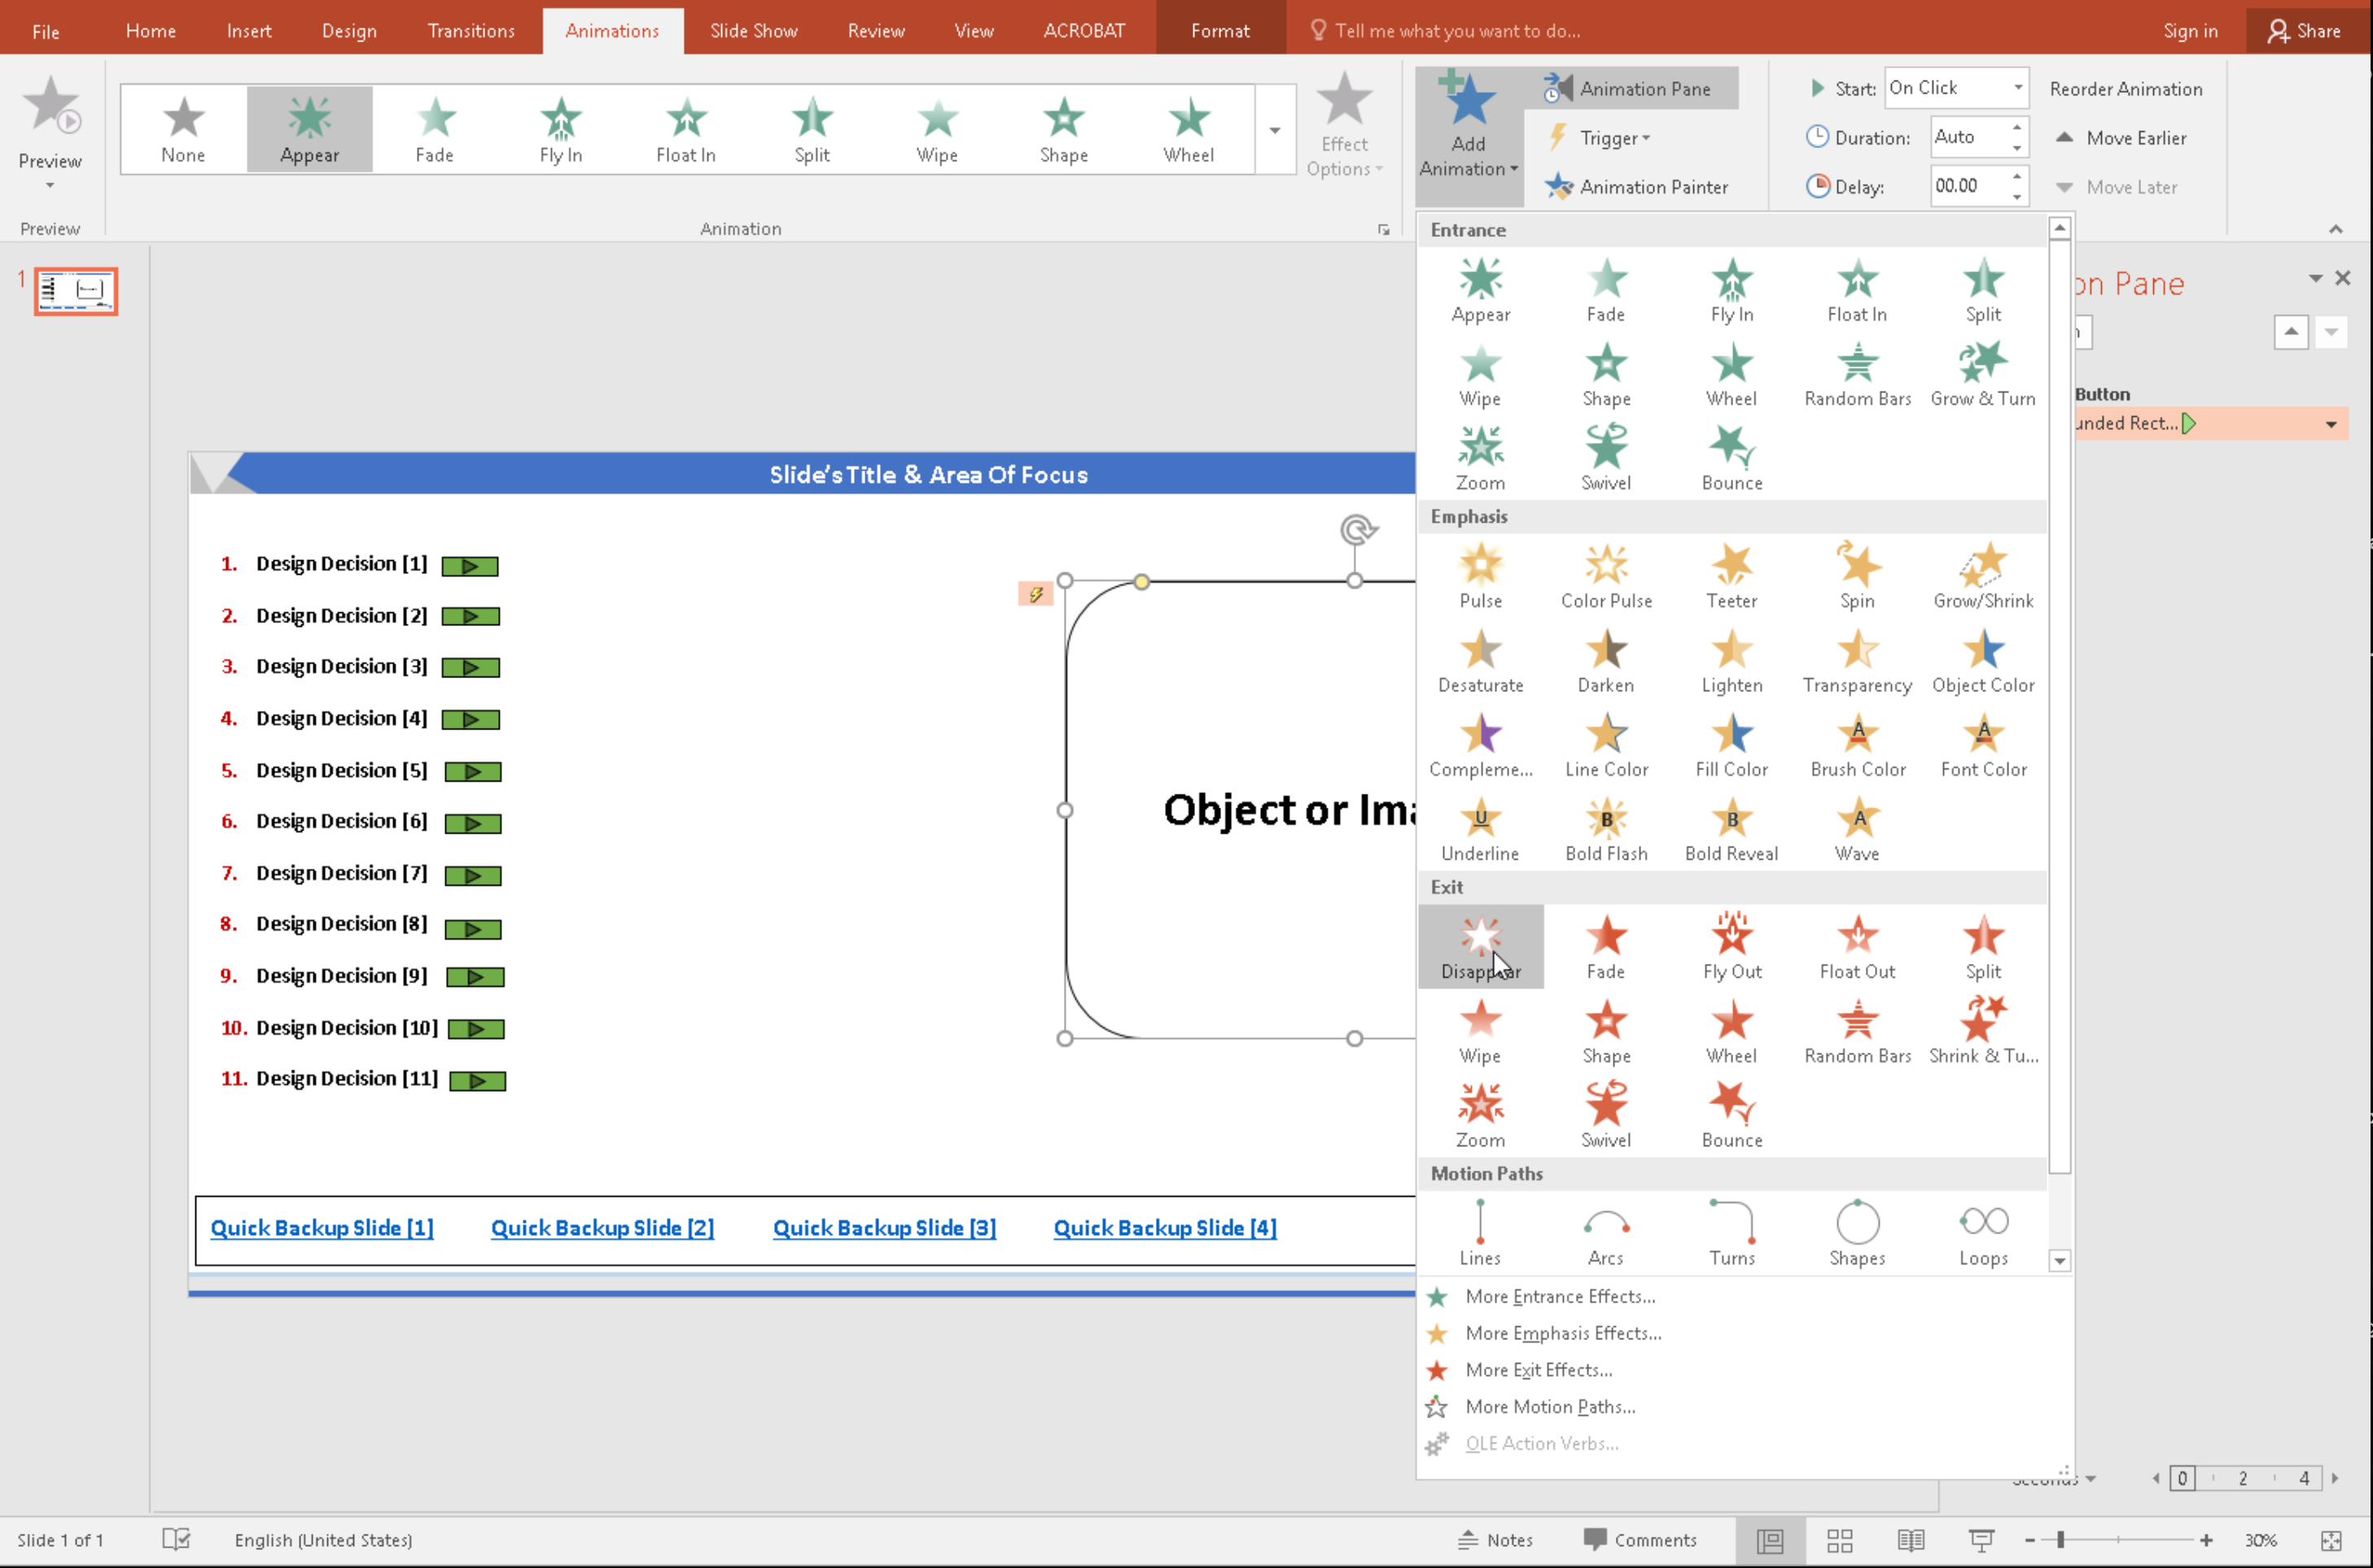
- Now we apply another trigger for that animation based on the same trigger object.
- And the final result, per object shoud look like this (look at the Animation Pane).
I’ve created a short video which shows the process and the final result in action as well:
Thank you,
(Abdullah)^2
Thanks …its really useful
Glad I could help :).