vSphere Tip To Toe: Reset ESXi root user password “Lost r00t o_0?”
Hello again my friends, this time I came across a customer who seemed to be completely blunt about the root password that he have set on his ESXi servers. As you may know previously we were able to reboot into single user mode and do the magic there.
Since ESXi implies security well its not possible sadly, now the method which I will be demonstrating hereunder is not supported by VMware and is purely an out-of-the-box method that will lessen your pain as a VMware Administrator and bring that smile of control to your face :-P (Wish I could take a picture of every Administrator after I reset the root password ^_^).
Update 28/04/2015: This also works with ESXi 6.0
Just a little briefing, the hereunder procedure will clear out the password that has been set to the root password and revert it to blank (no password at all) what we’re going to do it locate the disk where the “shadow” file is located in, then we’re going to mount it, edit it, save it and finally wrap everything back.
Tools:
You can use any live CD, my favorite distribution is Linux Mint (you can get it here). Here i am using version 14 named MATE, also if you don’t have much knowledge about Linux and using the shell it would be great to start now as after you’re done, you’ll know that you were not really using a computer %).
Procedure:
After you burn the CD/DVD and boot up you’ll see the following screens:

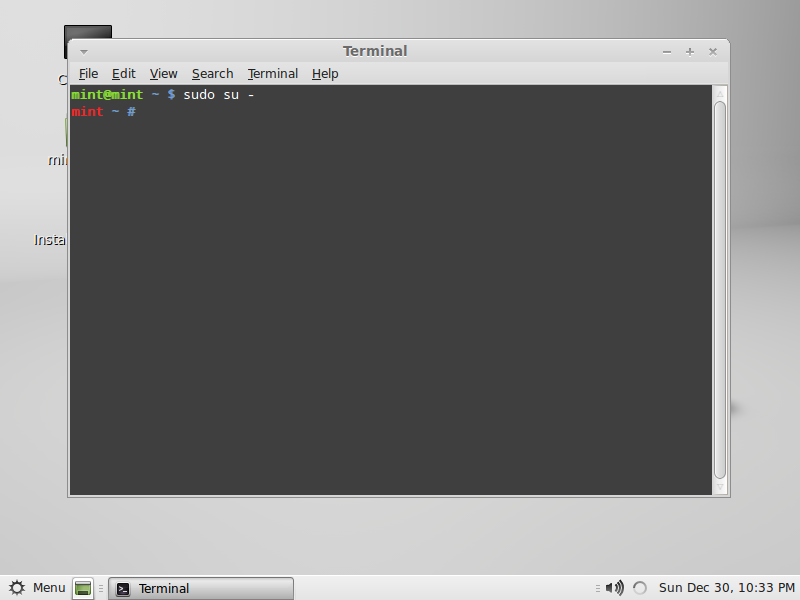
Now open the terminal (menu->terminal), then type “sudo su –” this how we gain super user access when booting a live CD distro.
Now since new installations of ESXi 5 no longer use MBR and rather use GPT (GUID Partition Tables) check Partitioning in New ESXi 5.0 Installations, this means you can’t use fdisk to list the current disks. Instead we need to use a utility named gparted, just type in the terminal gparted and the utility will start.
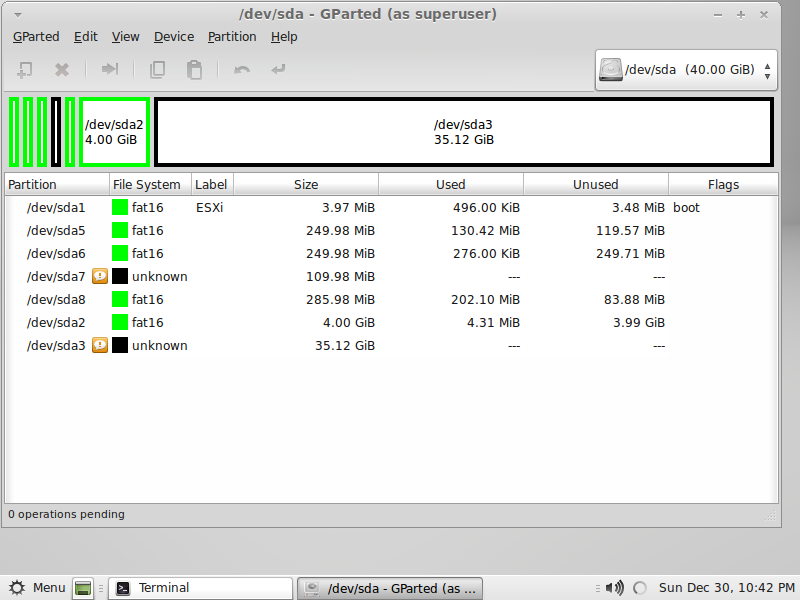
Okay, I see the disks but which one to mount? Let me talk to you a bit about ESXi 5 partitioning:
1- sda1: used for booting up the system and pointing to the hypervisor image.
2- sda5: this is where ESXi is installed.
3- sda6: this has the identical size of sda5 and will store recovery images.
4- sda8: holds VMware Tools and other stuff including paravirtual scsi disk controller.
5- sda2: holds log files and vmkernel related files.
6- sda’s that are maked as unknown, yup you’ve guessed it they are VMFS volumes.
Now that we know that the disk which we need to mount is sda5, close gparted and return to the terminal and follow the following commands:
1- Create the mount directory: mkdir /mnt/esxi_disk/
2- Mount the disk to the directory: mount /dev/sda5 /mnt/esxi_disk/
Now lets verify that what we’ve mounted, type:
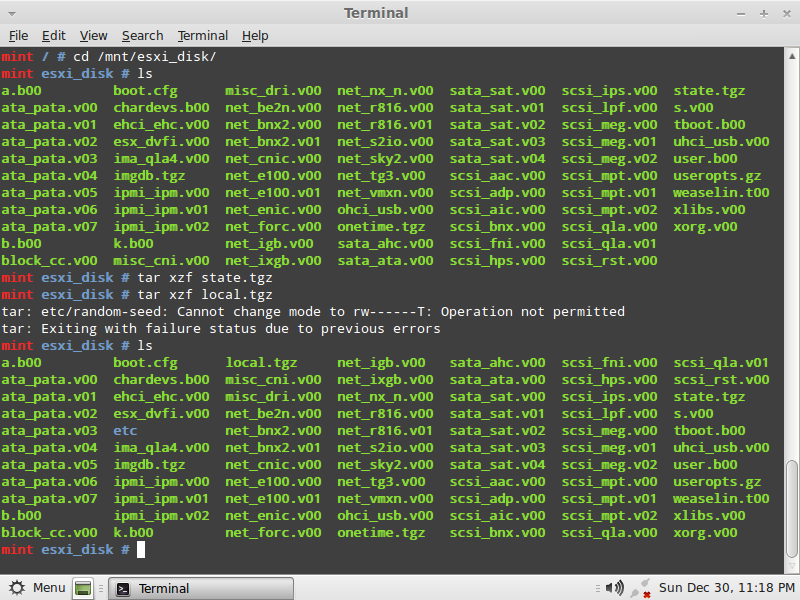
3- cd /mnt/esxi_disk
4- ls
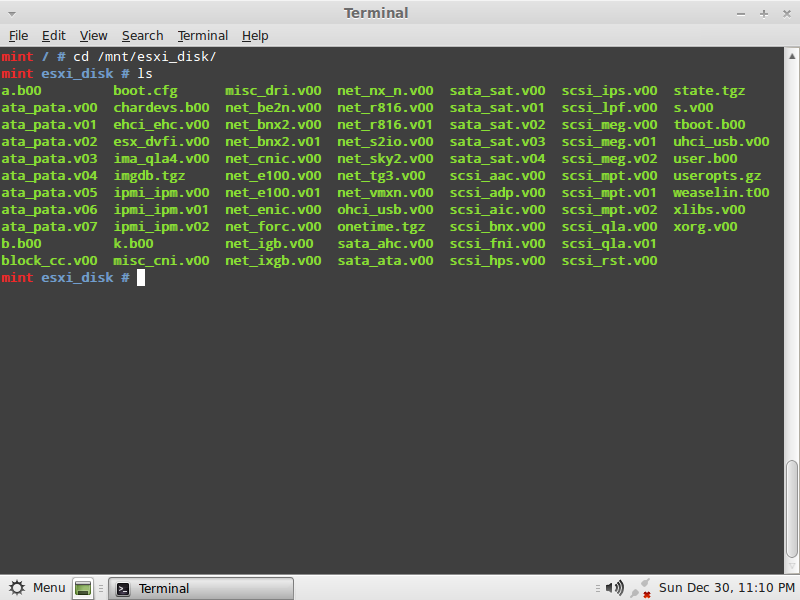
From the files listed, what we need is state.tgz this file contains another compressed archive named local.tgz which has the /etc directory compressed in it, what we need to do is un-archive these files so that gain access to the shadow file, type:
5- tar xzf state.tgz
6- tar xzf local.tgz
7- ls < here you will notice that we have the etc directory present.
Type:
8- cd etc
9- vi shadow (click here for the VI quick reference sheet)
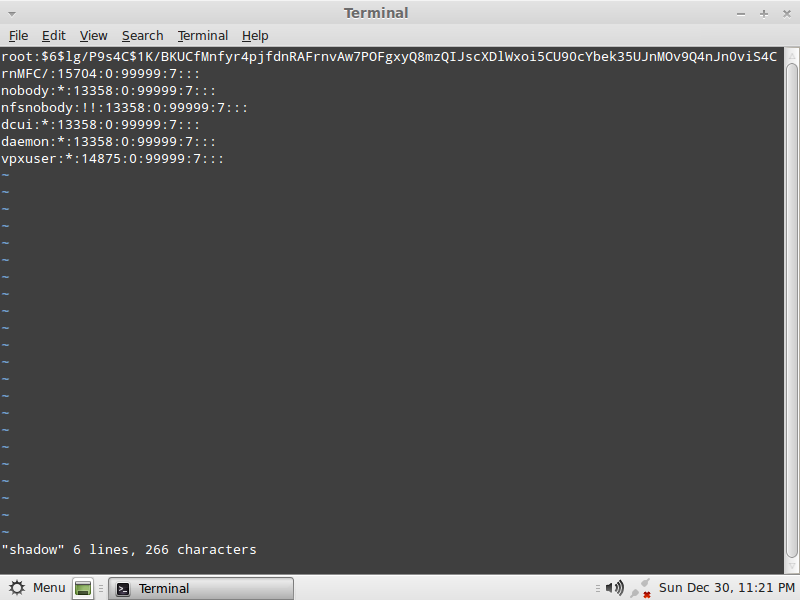
The root password is the encrypted string found between root:encrypted_password: just delete all the characters found between the two :
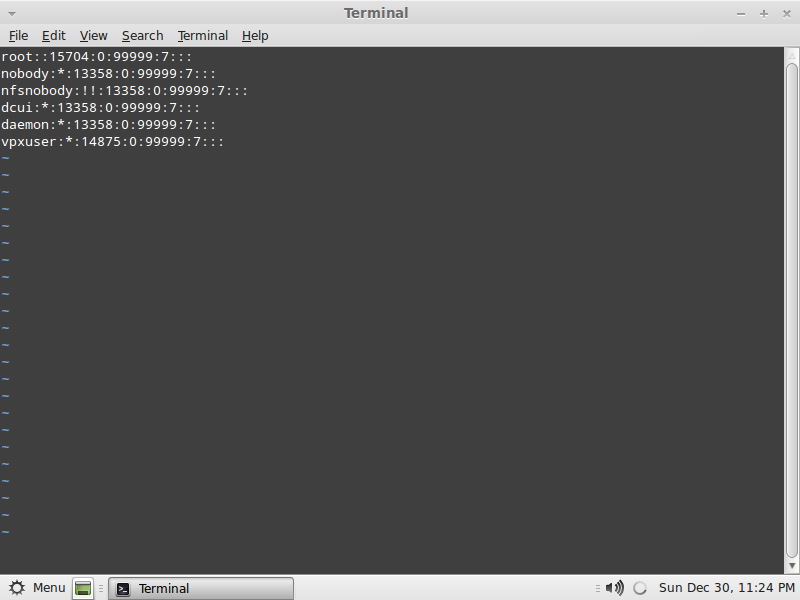
Save the file, press ESC and shift+: and type wq!
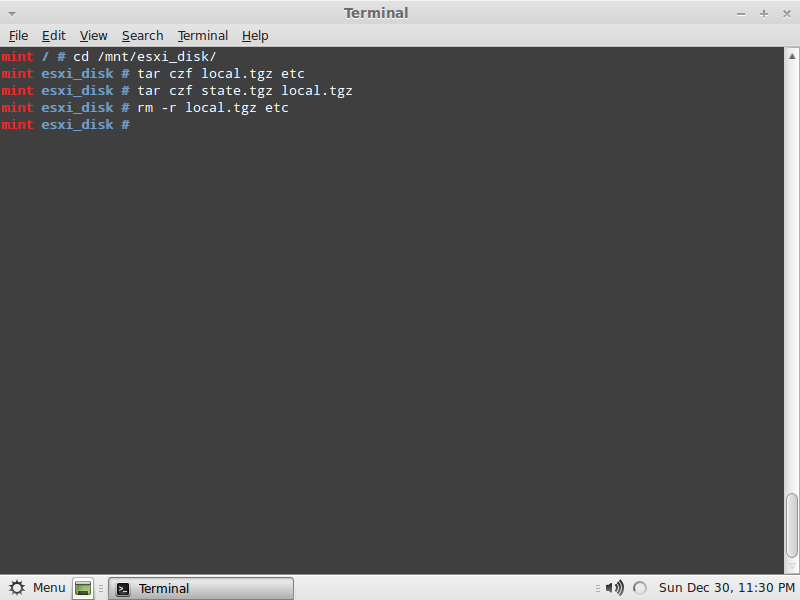
After we’ve saved the shadow file, we need to wrap the compressed archives, type:
10- cd /mnt/esxi_disk
11- tar czf local.tgz etc
12- tar czf state.tgz local.tgz
13- rm -r local.tgz etc
And we’re done, just type reboot then remove the live CD and wait for ESXi to boot and when you press F2 keep the password field blank and tada you’re in ;-), don’t forget to change the root password and if your memory tends to fail you with passwords put those password in an encrypted database somewhere.
Abdullah^2
Wonderful. Worked a treat. For some reason my cusor keys didn’t work in vi, but it was fixed using
http://linuxblog.pansapiens.com/2007/10/31/fixing-the-arrow-keys-in-vim/
Thanks!
Great to know I was able to help ^_^.
Dude you saved my life by boss was going to kick my @$$ if I didn’t get access to all of the vm’s on the server
Another reason for me to happy :)…very thrilled your boss wont be giving you a beating ;-).
Work great. Thanks.
Awesome dude!!! sooper, really helped us in a critical situtation,nice way of explanation and liked your article, All the best. :-)
Really good artical.. Helped a lot and good explanation ..
This makes me happier and happier that I was able to help :)
(Abdullah)^2
We tried it this morning and we can’t get it to connect to the ip address for the vsphere. Any thought?
Hi,
Well denial of connection is not related to the reset of the root account’s password, are you able to ping the host?
Thanks for the idea. We were using a test server before we did it on a live box. When doing this we overlooked that we had a laptop plugged in with the same static ip. After we unplugged the laptop restarted the network BOOM vSphere came up. We are going to go through it one more time before we do it live some evening this week. Thanks for your help.
Happens all the time :), all hail that glorious ICMP packet ^_^.
Thanks a lot!
Congrats, very useful.
Helped me so much.
Thanks for the post.
Thank you :).
Note that if you’re doing this procedure on vSphere 5.1 – you will need to perform all steps on both /dev/sda5 AND /dev/sda6!! Otherwise, the root password won’t get cleared out.
Thanks for your note, Steven. The root password did not get reset [ESXi 5.1.0] when only /dev/sda5 was modified. I was about to give up, but your note of also modifying /dev/sda6 saved my day. And, of course thanks to doOdzZZ, for the main tip.
This is what VMware’s Community is all about :)…help, help and some more help.
Very good article. Followed the step by step process, and solved the issue which was going on for two months.
So wonderfull. The consulting company was suggesting a complete reinstallation of the server. :)
Note: Just a small mistaping on the command to verify mounted disk on step 3.
cd /mnt/esxi_disk and not cd /mtn/esxi_disk
Again thanks a lot.
Hello,
Fixed, thank you and I am very glad it helped.
great article, however i seem to have a bit of a problem getting the file to save. I even go back to check to see if the file has been changed which it has. But after the reboot the password is still there? What could be the issue?
Hello Larri,
Sorry for the late reply, are you compressing the archives when done saving the file? Steps 10 to 13?
Hello, I thinking to apply this procedure on one of my ESXi servers, I don’t really known how I could lose the root password!!! Anyway before doing this, I would like to know if there are many risk associated with this procedure… I mean, I known that VMware KB said that you NEED to re-install your server, but this procedure looks very logical and make me think that you probably won’t get a unstable system… Has anyone had problems with the ESXi server after applying the suggested method?? I would use this over ESXi 5.1 U1 version.
Thank you in advance.
Greetings from Colombia.
Hello Hernan,
Thank you for sharing your thoughts, I have done this with numerous customers and I didn’t have any issues afterwards. I suggest you would do it on a test box or on a test ESXi on VMware Workstation first, just that you’d know what you’re doing and what would the outcome be.
Thank you once more,
(Abdullah)^2.
Had to do the same procedure like Steven, but did it on a vSphere 4.x. Like him i had to perform all steps for sda5 and sda6.
Was moving along swimmingly until tar xzf local.tgz, then got etc/random-seed cannot set to rw—–.
Not a linux person so backed out until I find some answers
Hello,
Can you provide a screenshot please of what you’re getting?
Thank you.
I can’t believe I was dumb enough to forget my password… \:-(
And when “upgrading” to ESXi 5.5, and “reinstalling” didn’t clear the password I thought I was sunk. So one more Google search and I found your blog. Worked like a champ! I really appreciate the tutorial.
Thanks so much!
Glad to be of aid and help :).
After going through this process and booting up the ESX host, how do you ensure that your guest VMs on the host power up? Do they “remember” their state and come back up automatically? Or would you need to power them on manually?
Hello, yes your VMFS datastore will still be intact and if you mean that you have your virtual machines set to automatic startup then yes they will start normally without any issues.
So when we tried this on our test ESXi 5.1 host, everything seemed to work and the password was wiped / reset successfully. However, when trying to access the host from VSphere client, we now get an error message: vSphere Client could not connect to “ip address”. An unknown connection error occurred. (The server could not interpret the client’s request. (The remote server returned an error: (503) Server Unavailable.))
Help!
Hello,
The error which you’ve mentioned is related to network connectivity and not to the ESXi root account reset, are you sure of the host’s network configuration?
I was killing myself trying to resolve this until I came across this blog.
The fix is to change the state.tgz file on BOTH /dev/sda5 AND /dev/sda6.
Thanks!!!
I am very happy this was useful to you.
Hey man THANKS A LOT. Just dealt with a new client with virtual server and only way to get in is through vmware. Of course their last Tech didn’t leave any credentials. But shortly….THanks a lot this worked to the T.
P.S. Vmware 5.0 I only had to do sda5 but worked like a charm.
Glad you made your client happy :).
My Friend, your article saved me this morning. Obviously it was one of our consultant who helped me as I am no good with Linux. It did work very good and we had to do it on both the partitions as it was ESX 5.1. Thanks once again for your article which has helped quite a few people including me.
I am absolutely glad I could be of help and assistance :-).